#4 plane lacks enough adjustment for plane blade

UKworkshop.co.uk

Help Support UKworkshop.co.uk:

This site may earn a commission from merchant affiliate links, including eBay, Amazon, and others.

DennisCA

Established Member
Joined
26 Apr 2014
Messages
1,058
Reaction score
211
Location
Finland
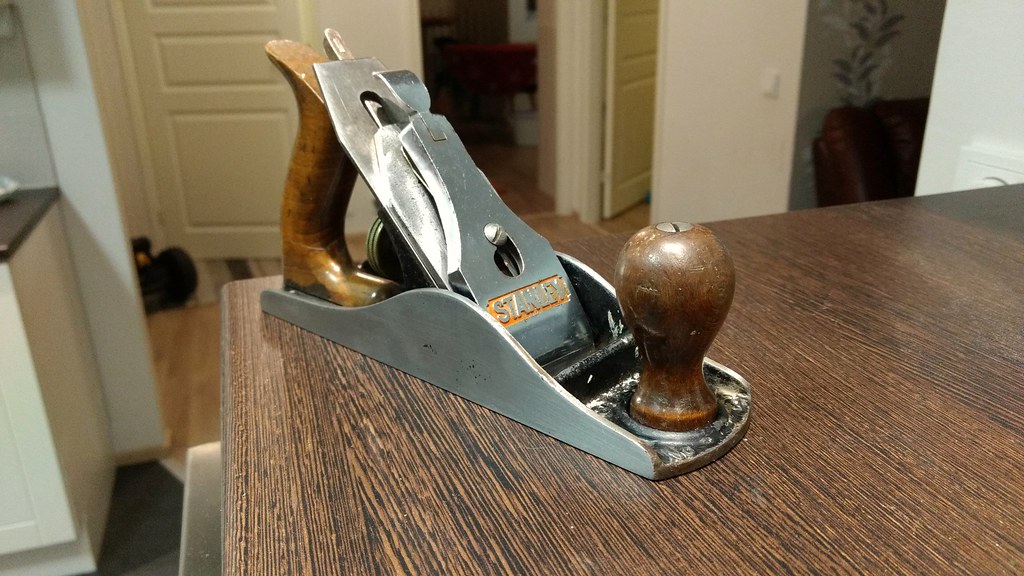
Hmmmm, I was going over this #4 plane I got by the brand of Esteel (some swedish stanley copy) which I have never really worked as it should. Well I got done with my #3 smoother and having real nice results with setting the cap iron very close to the blade.

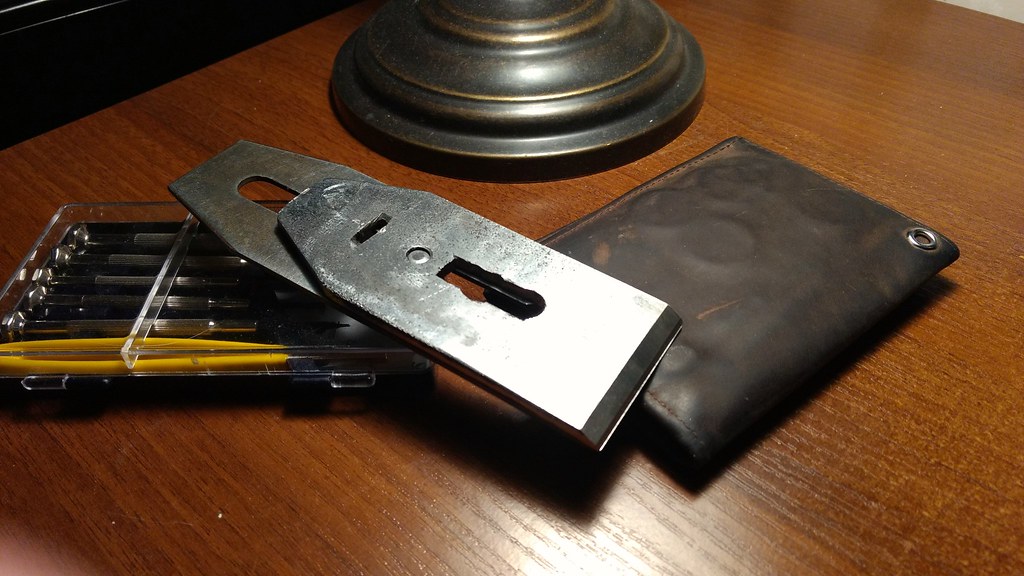
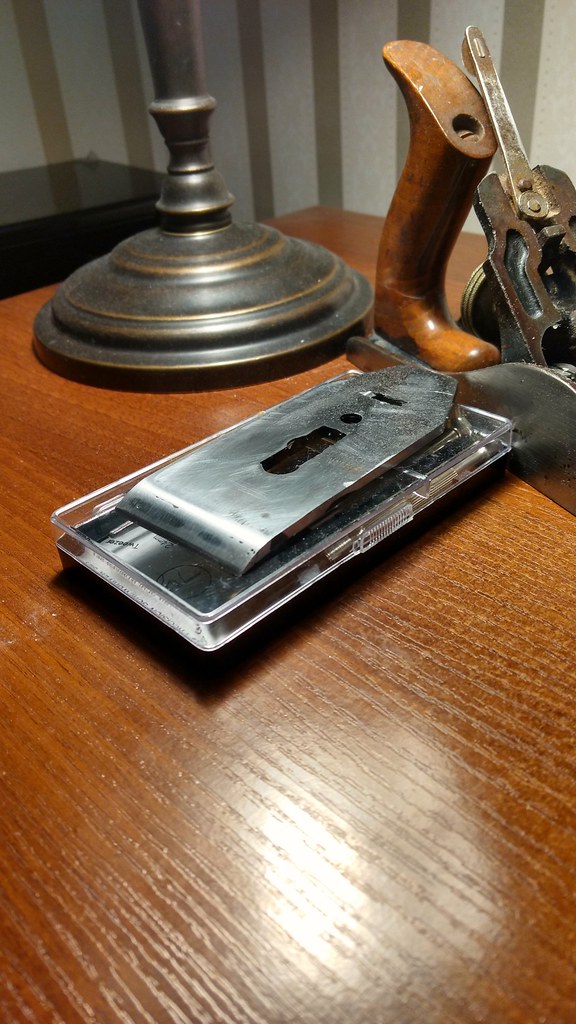
So I was going to do the same on this plane but it was a real pain in the neck, since the cap iron and blade both where really bent out of shape, I dunno what has happened to this plane it's previous life. A couple of hours of fetting got me there though and I saw no light coming through the cap iron. I was gonna put it back in and test how it worked with the cap iron set real close on this plane... But I can't adjust the blade enough for the plane to actually make a shaving with the cap iron set like this... It seems the cap iron screw bottoms out against the frog in the recess that houses the cap iron head, and that stops further downwards adjustment.

Now I am not sure where to go from here, in order to get the plane to work I have to set the cap iron back too much and that just leads back to tear-out town. I could get a new cap iron screw that's physically smaller, or grind this one smaller. Or drill and tap a new hole on the cap iron that's set a bit further back, though I think it would be too close and I lack the proper tap for this I bet. I am leaning towards making the head of the thumb screw smaller right now but I am open to suggestions.

I hope my explanation was understandable.
 
Sounds like the slot in the cap iron is in slightly the wrong place, I have had this problem and I taped another hole for the screw close to the original one, 3/4 Whitworth if I remember correctly.

Pete
 
Like Pete, I had a plane and I was tearing my hair out as I could not understand what was happening, turned out to be the cap iron.
Unlike Pete, I just chucked it away and used a spare.
 
Drilling and tapping would be doable, but I lack the proper threads for whatever the factory original is, probably some UNC thread. I could make a new screw and use M6 thread or something.
 
DennisCA":3nap4qbk said:
...grind this one smaller.
That seems like the most rational fix to me. No reason to be precious about the screw so if you can reduce its diameter it's a good workaround. Another option is grinding some iron from the bottom edge of the cavity in the frog, maybe keep that in reserve in case you need just a hair more clearance after reducing the diameter of the screw as much as you want.

With fit issues like this it's likely the cap iron is from a different plane. Often swap-ins fit well enough that the plane can be put to work making shavings, but as soon as you need finer settings you run into problems (luckily the issue is often with the slot, which can be filled deeper if need be).
 
DennisCA":gecge5xh said:
...But I can't adjust the blade enough for the plane to actually make a shaving with the cap iron set like this... It seems the cap iron screw bottoms out against the frog in the recess that houses the cap iron head, and that stops further downwards adjustment...
Somehow - your cap-iron is too short. Either quality control at Esteel was very poor, or the cap-iron is not from that plane.

When you set up the plane to almost work, what position is the yoke (Y lever) in? If it's near perpendicular (at right angles) to the frog then tapping a new hole, or reducing the diameter of the nut is a workable fix. However, if the yoke is way forward (down), and barely engaging in the cap-iron slot, then the whole setup is wrong anyway - and you should look for another cap-iron.

If it were me, I'd look for a slightly longer cap-iron in either circumstance (but then I've got a whole bunch of wrecks to pick through :oops: )

Cheers, Vann.
 
Vann":39kidvsw said:
DennisCA":39kidvsw said:
...But I can't adjust the blade enough for the plane to actually make a shaving with the cap iron set like this... It seems the cap iron screw bottoms out against the frog in the recess that houses the cap iron head, and that stops further downwards adjustment...
Somehow - your cap-iron is too short. Either quality control at Esteel was very poor, or the cap-iron is not from that plane.

When you set up the plane to almost work, what position is the yoke (Y lever) in? If it's near perpendicular (at right angles) to the frog then tapping a new hole, or reducing the diameter of the nut is a workable fix. However, if the yoke is way forward (down), and barely engaging in the cap-iron slot, then the whole setup is wrong anyway - and you should look for another cap-iron.

I had similar problem with a big No 8 a while back. Turns out the cap-iron was from a transitional plane, I was given a loan of the correct size one by one of the very very chaps here and later, lucky was able to buy a really nice one, plus blade by Hock from the ebay and never looked back :D
 
DennisCA":39gamozq said:
...It seems the cap iron screw bottoms out against the frog in the recess that houses the cap iron head, and that stops further downwards adjustment...
Rereading the original post - are you sure it's the cap-screw bottoming out, not the bulge on the cap-iron hitting the front of the mouth?

Cheers, Vann.
 
Yeah there's plenty of space in the mouth of this plane. I tried making the cap screw smaller but it wasn't enough, I drilled and tapped a new hole because lo and behold, an M8 thread seems to work perfectly. But then it interfered with the lateral adjustment so no go there either... I don't wanna spend money on this plane, a hock blade and chip breaker would be more money than I have spent on any single plane ever. I think the most I paid was 55 euros or so for my no 7 jointer. But it's just a piece of soft steel and I got some of that stuff so I made my own hock-esque thing, 25 degree main bevel and a 55 degree micro bevel for the chip breaking action itself:
32128656065_c1ce824250_b.jpg


However.... I made this one a smidge too short too! Argh! Fortunately this being much thicker steel, I should be able to plug weld up the holes with my TIG and make new ones a bit offset.
 
It'll be interesting to see your working one, compared to the old one, then the fault should be plain to see.

Bod
 
Well, I for some reason figured it'd be easier to build on metal at the front and then regrind, well in theory perhaps. In practice not so much. But I got it done, but I lost the nice sharp lines, had to round it all over and then finished with a tiny 50-60 degree bevel at the front. Won't win any beaty contests but the lever cap hides it fortunately. But most importantly it does work. Been taking tearout free shavings after I adjusted the chip breaker close enough. Sole needs flattening though, high spots infront of and behind the mouth (or would you consider them low spots? At any rate the wear is most in the center).

31339439733_edaa793771_b.jpg
 
Sole is now flattened too. I also ran the frog and body in my ultrasonic cleaner:
31355837613_62b1e349de_b.jpg


Haven't done anything about the wood parts, also I swapped the lever cap by mistake with the one from my #5 plane. Will see how I get to like this plane, my favorite so far is my #3. But I want to make a wooden bodied smoother some time. I have an old cap iron and plane blade from a scrapped wooden jointer. Maybe it can be repurposed.
 
Oh yeah it works real well now. I tried it before and after flattening the sole, seems to make a huge difference to get rid of the wear in front and after the mouth. Definitely feels like a high quality plane now.
 
Back
Top