Infill Smoothing Plane Project

UKworkshop.co.uk

Help Support UKworkshop.co.uk:

This site may earn a commission from merchant affiliate links, including eBay, Amazon, and others.

rxh

Established Member
Joined
2 May 2011
Messages
699
Reaction score
77
Location
Surrey
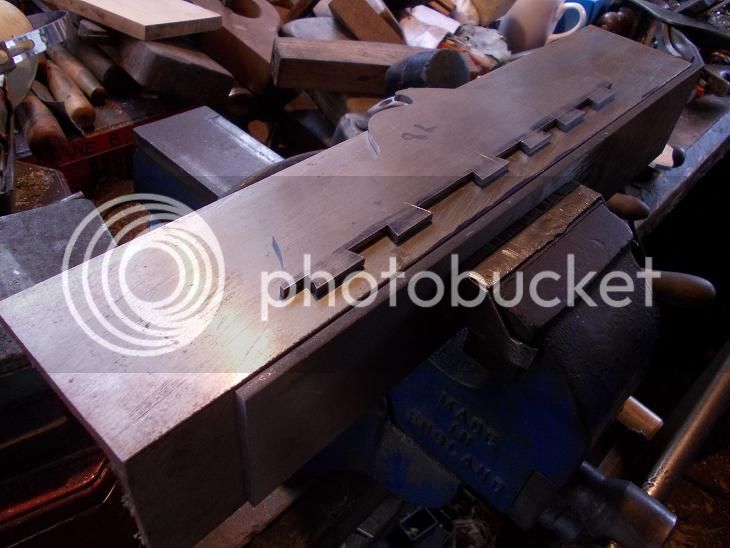
I am considering making a dovetailed infill smoothing plane using this 2” Robert Sorby blade. The blade has cleaned up quite well but its slot was not central so I machined it to make it equidistant from the sides. It is a tapered blade, which is not ideal for this type of plane but I have calculated that the mouth gap would open up by about 1/64” (0.4mm) if one inch is the blade is sharpened away and I think that should be tolerable (I suppose a shim could be fitted under the blade if needed).

I have made this preliminary drawing after studying various sources, including Richard T’s excellent thread: dovetailed-infill-first-fumblings-t46458.html and Jim Kingshot’s book: Making & Modifying Woodworking Tools. Now I feel almost ready to begin but before I cut metal I would be pleased to receive any comments or tips and also a recommendation for the best dovetail angle to use. The metal dovetailing will be a new experience but I believe I have tried the other techniques needed. The body will be parallel sided because I feel that a coffin shape might be a bit ambitious for my first attempt. A few details to be decided are: the number and positions of infill attachment points and the size and attachment details for the “frog block”.

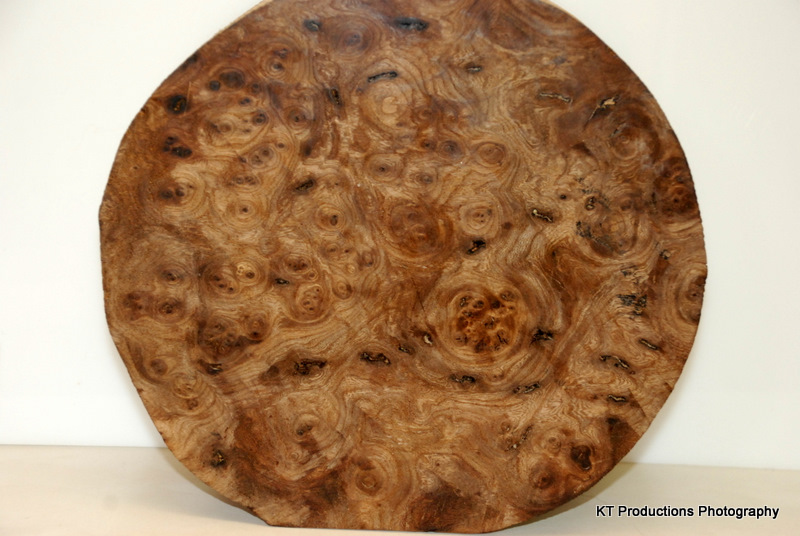
The proposed material is mild steel except brass for a few parts including lever cap and knobs. For the infill wood I am thinking of using some mahogany recovered from an old piece of furniture.
 

Attachments

  • IMG_IP_0_C.jpg
    IMG_IP_0_C.jpg
    250.1 KB · Views: 4,159
  • IMG_0811C.jpg
    IMG_0811C.jpg
    193.7 KB · Views: 4,158
  • IMG_0818C.jpg
    IMG_0818C.jpg
    139.4 KB · Views: 4,153
Hi Rxh

Looks promising. :)

The mouth width will be dependant on the angle of the iron as well as the thickness of it. I have made 47, 50, and 55 degrees and the mouths have got tighter as the angle has increased.

I have been riveting the frog blocks on (covered in the first fumblings thread I'm sure) and also riveting in the infills butwhile the infills can be screwed in the frog block is (I think) best riveted - brazing maybe very difficult to clean around afterwards.
 
Thanks, Richard.

What dovetail angle would you recommend? I was thinking of 1 in 4. My materials arrived today so I hope to cut some metal this weekend if the weather is not too cold. Last weekend the lock on my shed was frozen and I gave up in disgust.
 
I have settled on 75 degrees - 80 would OK I'm sure. I started with 60 and the final getting into the corners with a triangular needle file is a real pain. It's amazing how stubbornly rounded they stay under a magnifying glass. Also when cutting the pins to correspond, there is less of an angle to work the saw back to square for the majority of cuts. (Assuming you're going to use a saw...)

I'd be interested to know what type of mild steel you got - black or bright ?

Don't forget to add 1/16th " extra for peining!!!
 
Thanks again. 1 in 4 corresponds to 76 degrees so I looks like I guessed about right. It is bright mild steel sheet - I took note of your remarks about the labour of cleaning up the black stuff. Yes, I do intend to use a saw.

I'll post some pictures - assuming that I don't mess up the job.....
 
Well, I have made a start. Here are the sides cut out and temporarily rivetted together and I have started to cut out the dovetails.
 

Attachments

  • IMG_0835C.jpg
    IMG_0835C.jpg
    172.8 KB · Views: 3,843
  • IMG_0832C.jpg
    IMG_0832C.jpg
    126.1 KB · Views: 3,843
Looking good rhx yet you don't need to cut both sides exactly the same .... it might save some trouble of course if you do .. but the real important thing is if you get them marked onto the sole right.
If the front and backs are level when scratching the marks for the pins onto the sole - it doesn't matter so much if the tails are not exactly the same. That bit is approximate.
I have tended to cut out the sides, mark and dovetail them individually, and then clamp them and marry them by filing.


Looking very good. :)
 
Just a thought about accurately holding the cut sides to mark the pins on to the sole - I have started to use a bit of steel angle that I cleaned up. It's dead square and offers the opportunity of multi - clampage:

DSCN1037s_zpsfdc8bc5b.jpg


The sole can be held in the vice and adjusted to be flush with the top surface ( this is not the actual sole but you get the idea)

DSCN1038s_zpsc8c99a50.jpg


And the plane side can be clamped to the top and fine adjusted with a mallet 'til it's spot on.

DSCN1040s_zpsaf5973f6.jpg


Then you need have no worries about pressing hard enough with the scriber to get really good marks - it's all clamped up tight and won't move.
 
An excellent idea Richard, I used to do something similar with an engineers angle plate, but clamping both the sole and side was a bit of a phaff, the angle section in a vice is a far better solution.

Aled
 
Cheers Aled

I started by using a square block of wood but the G clamps need to be open a very long way and it was not as stable somehow.
 
Thanks Richard,

That is a good tip about the steel angle. I hope to start work on the sole this weekend.
 
I finished cutting the dovetails in the sides this week and set to work on the sole yesterday. I used an angle grinder with a thin disc to cut out the rectangle roughly, then filed to size. To my frustration I couldn't find a suitable piece of angle in my junk boxes so I did the scribing by holding the sole in the woodworking vice and cramping the sides to the bench top. I sawed just within the scribed lines then drilled followed by angled saw cuts to remove as much waste as possible before filing the pins to fit the sides. The sides are not permanently attached yet and I'll remove them to work on the mouth and frog bock next.
 

Attachments

  • 2013-04-14 17.56.36C.jpg
    2013-04-14 17.56.36C.jpg
    190.4 KB · Views: 3,605
  • 2013-04-14 17.56.11C.jpg
    2013-04-14 17.56.11C.jpg
    185.2 KB · Views: 3,605
  • 2013-04-14 12.12.28C.jpg
    2013-04-14 12.12.28C.jpg
    156.5 KB · Views: 3,605
  • 2013-04-14 10.46.21C.jpg
    2013-04-14 10.46.21C.jpg
    155.9 KB · Views: 3,605
  • 2013-04-14 10.13.50C.jpg
    2013-04-14 10.13.50C.jpg
    151.9 KB · Views: 3,605
  • 2013-04-14 09.53.09C.jpg
    2013-04-14 09.53.09C.jpg
    137.7 KB · Views: 3,605
  • IMG_0837C.jpg
    IMG_0837C.jpg
    238.3 KB · Views: 3,605
  • 2013-04-14 17.48.45C.jpg
    2013-04-14 17.48.45C.jpg
    105.1 KB · Views: 3,605
Excuse my ignorance but shouldn't the sole but cut in a dovetail shape too - not square/right angled?

Rod
 
Rod: yes it will end up as a dovetail shape both ways. If you look at Richard T's thread: dovetailed-infill-first-fumblings-t46458.html you will see how it is done.

Thanks Adam,
I'm enjoying the challenge but my elbow is starting to play me up a bit with all the sawing and filing!
 
The ' double' dovetail comes just before peining Rod - filed arrises to move the steel of the tails into.

Looking very good rxh.

I've found that when cutting the mouth, instead of chain drilling and filing the whole thing, it is far easier and quicker to chain drill and file just enough to get a saw blade in. Re - attach to the hacksaw frame and saw it all out just inside your scribed lines down to a single drill hole at the other end. This means you can get a decent sized file in to finish it - it's a right pain doing all that work with a card file. Knocks at least a day off proceedings, is much kinder to the wrists and you are more likely to avoid accidentally filing the other side of the mouth with the other side of the file. #-o
 
Beautiful workmanship rxh!! =D>

I too am watching this with interest....waiting for the infill part to see what you choose for that.

If you're anything like me you will debate for ages which type of wood to go for...even though you may have already got an idea...then you will have fun sourcing just the right bit and then comes the agonising of the first cut...usually into a treasured bit of hardwood you've been "saving for that very special job"...and fallen in love with in the raw over the years.

I can't bring myself to cut into my "photo stand".....

DSC_0027.JPG


I think I might make something from her one day...nah!!! :mrgreen:

Good luck with the next bits....I sympathise with the sore arms...

Jim
 
Thanks for your kind comments Jim.

That's a very impressive piece of wood you have there - I bet it would be difficult to work. I have some mahogany from an old desk that might do but I haven't cut into it or planed it yet. I think mahogany should be stable as it was commonly used for making cameras and scientific instruments. I've also got some yew somewhere -it is pretty wild looking stuff but I don't know how stable it would be.

I've now made the frog block and cut out a rectangle that is intended to become the cap iron.
 

Latest posts

Back
Top