Bird mouth Joinery

UKworkshop.co.uk

Help Support UKworkshop.co.uk:

This site may earn a commission from merchant affiliate links, including eBay, Amazon, and others.

Brandlin

Established Member
Joined
5 Aug 2015
Messages
536
Reaction score
5
Location
Flint
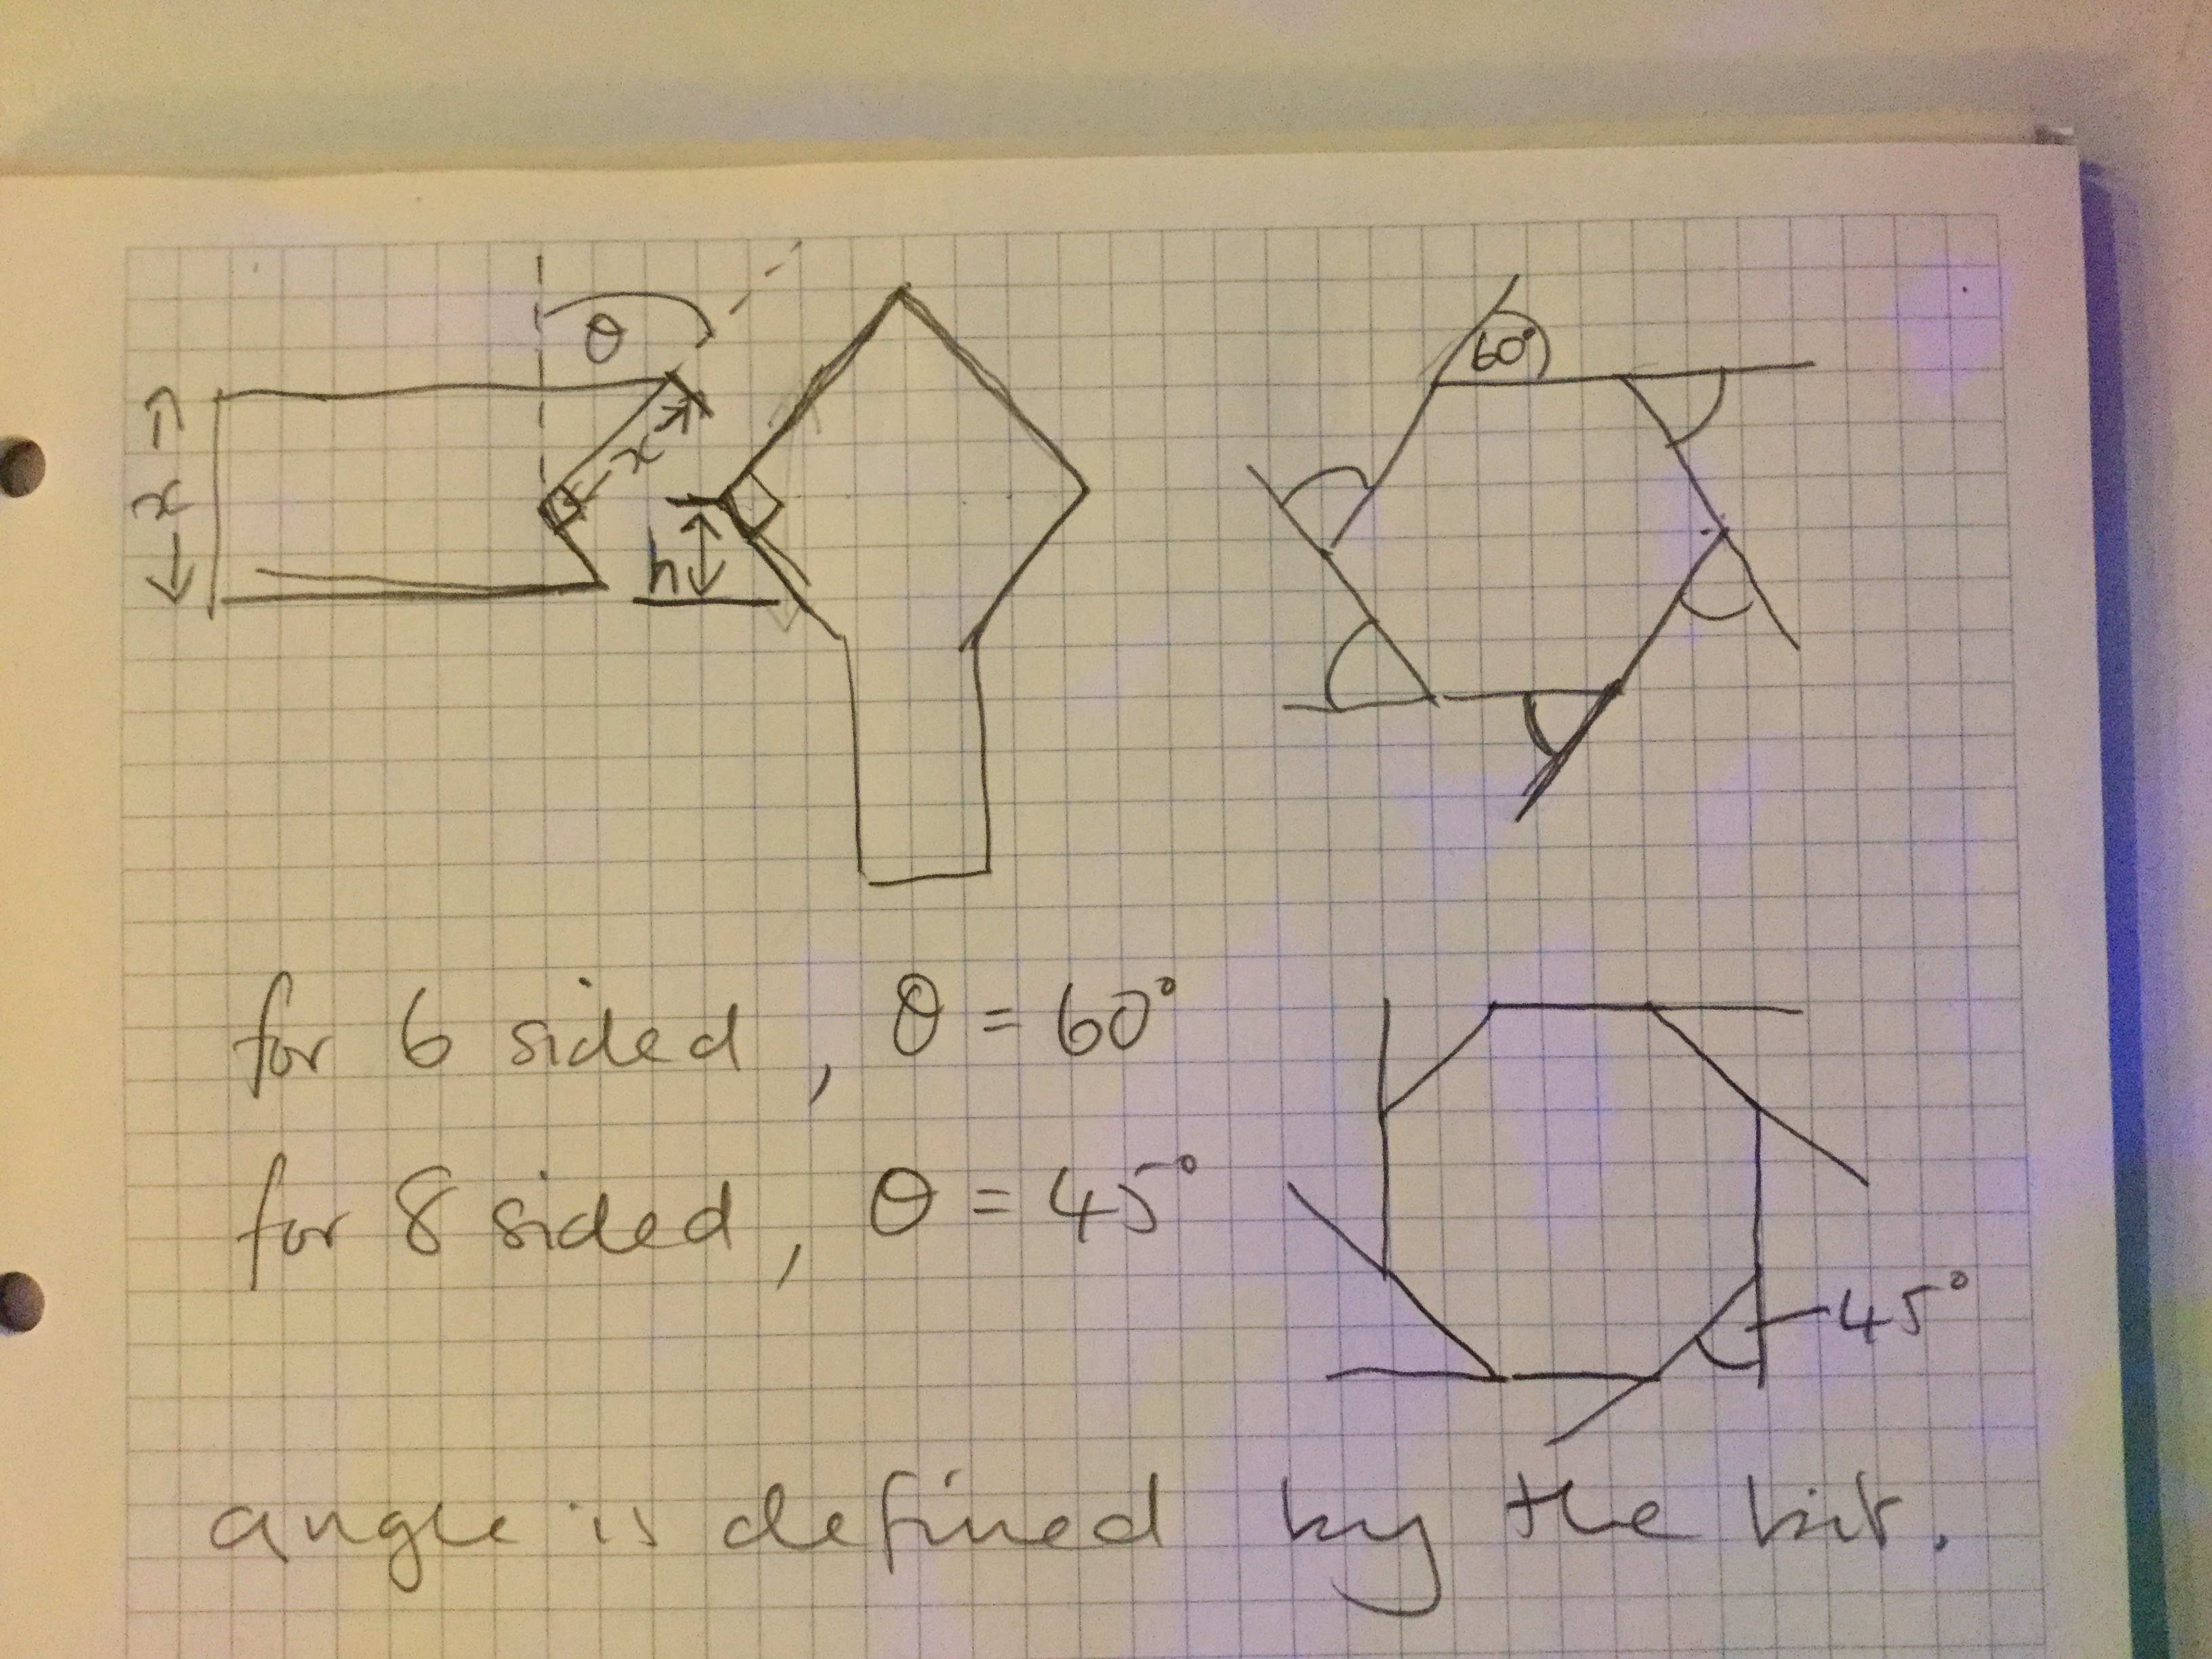
I'm trying some birdmouth joinery to make stave constructed cylinders and flared shapes.

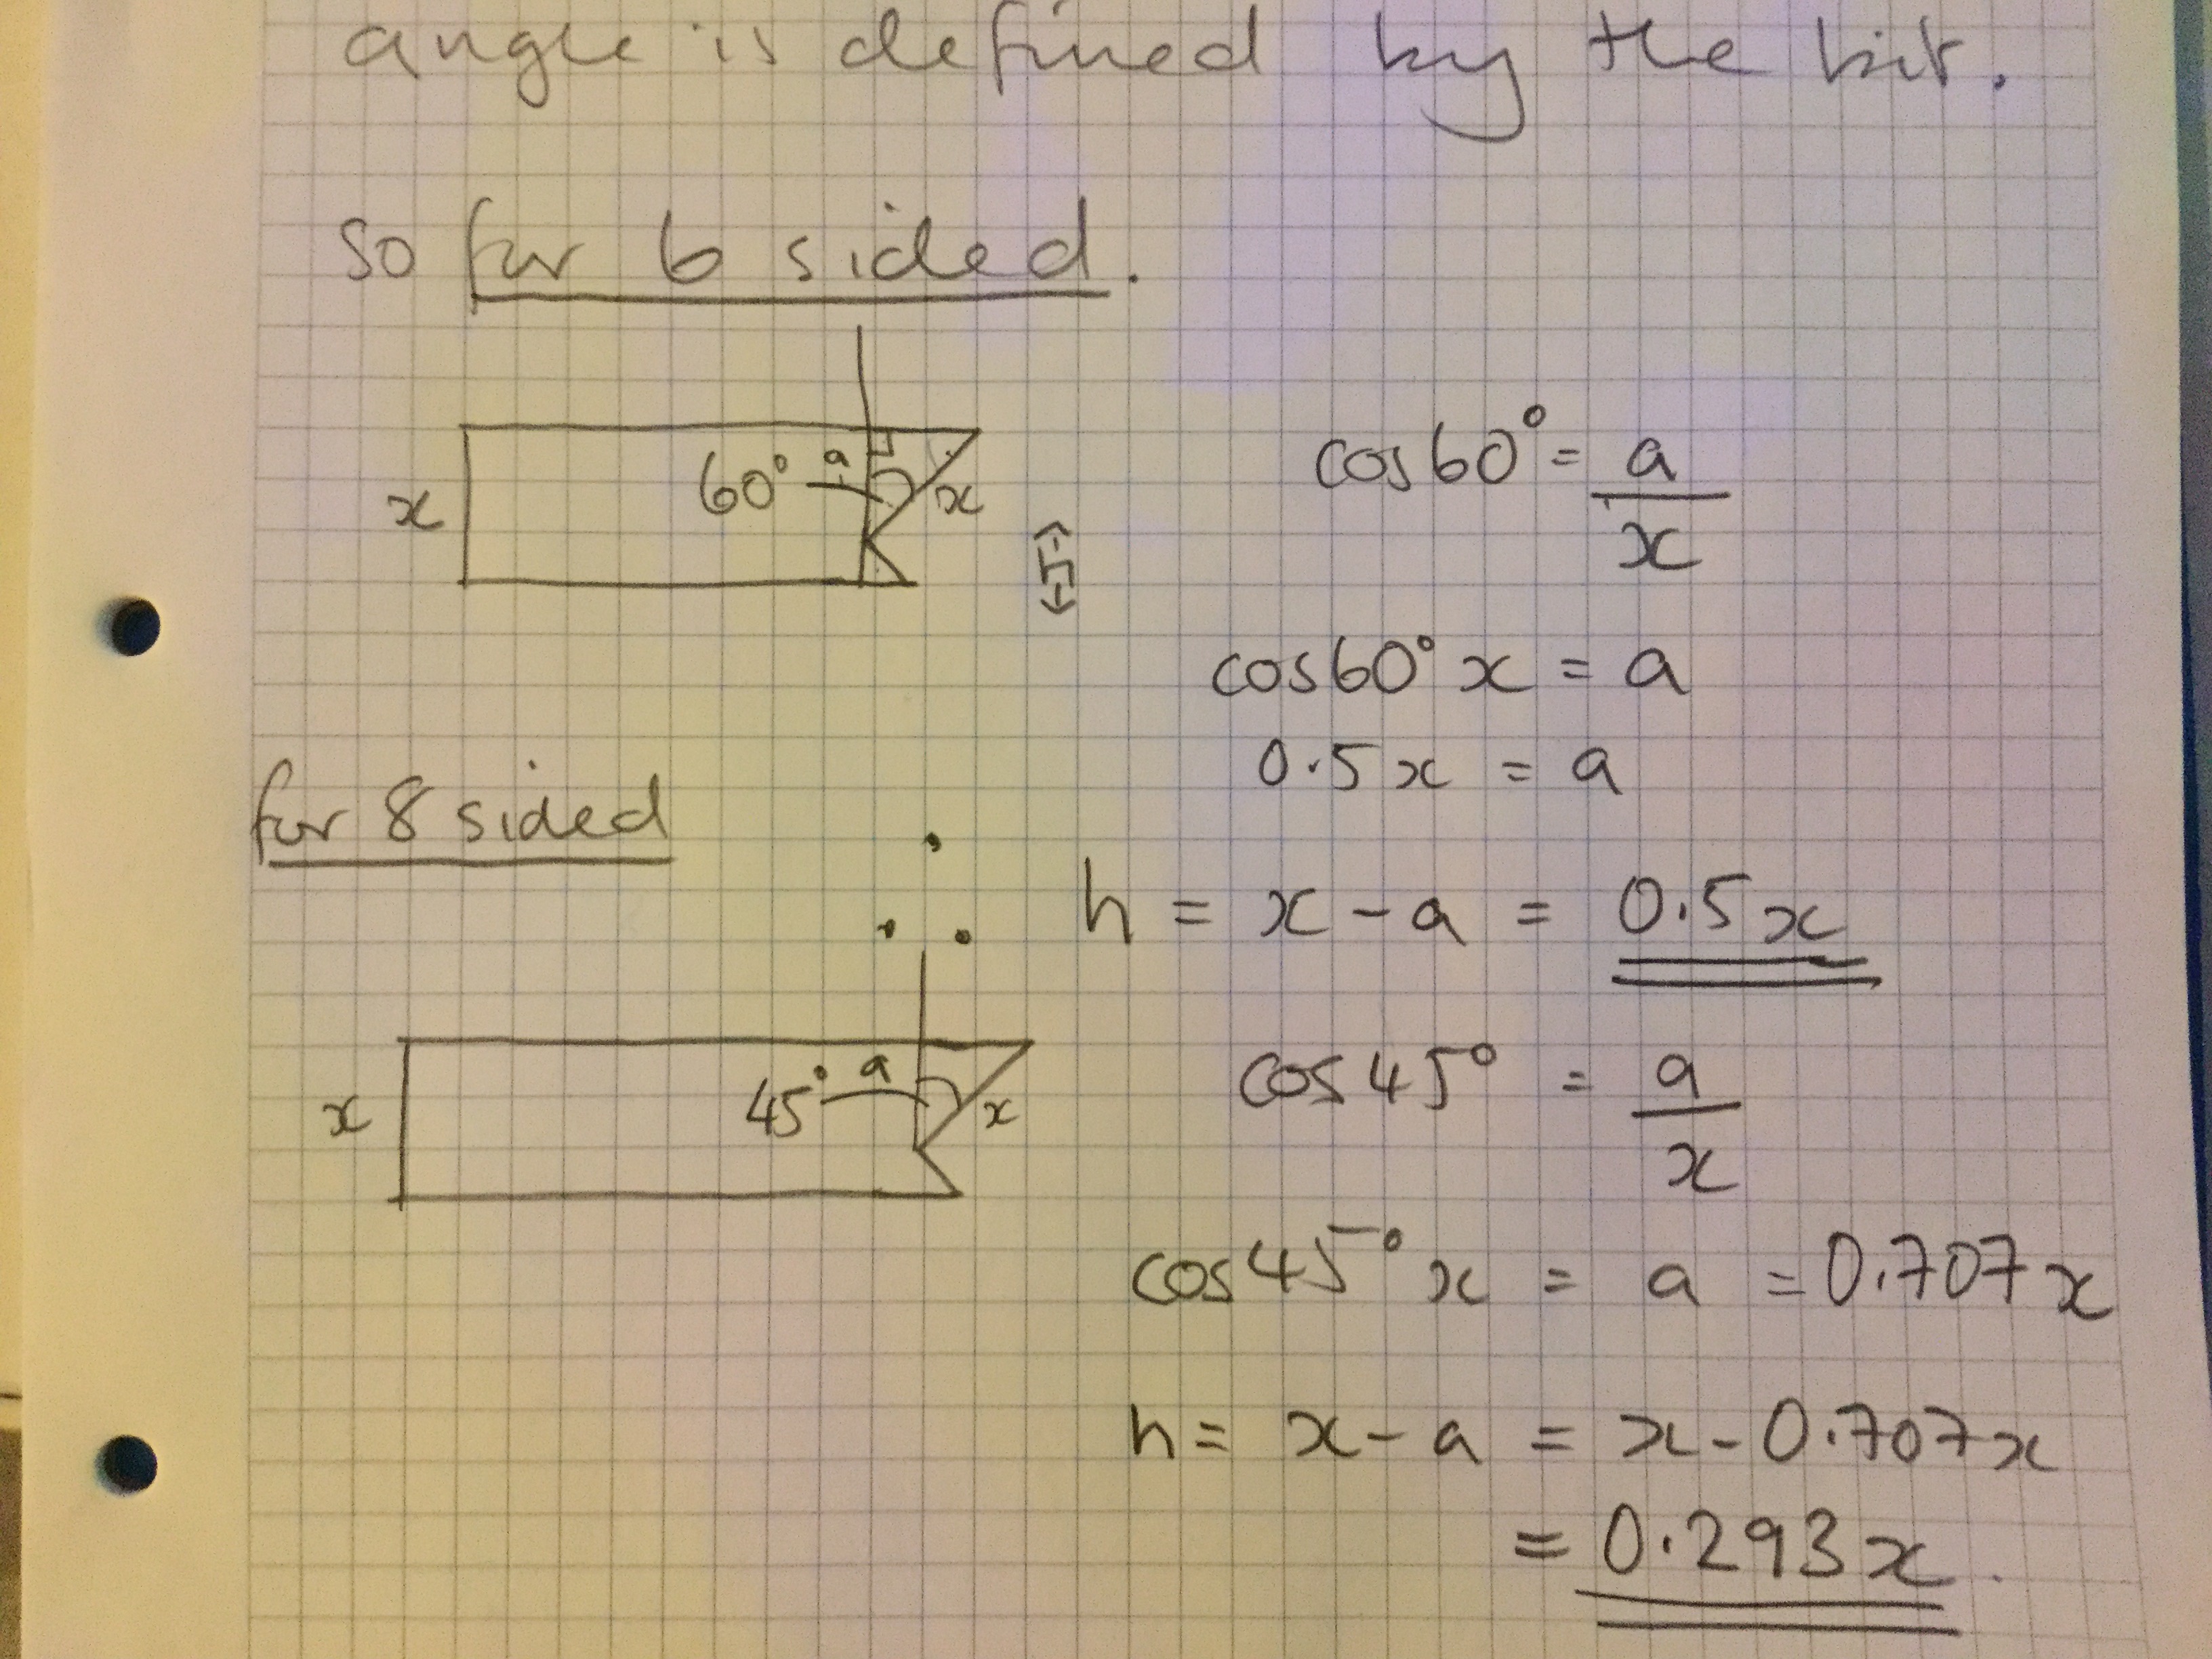
Anyone got any practical advice on setting router bit depth and height?

I am finding the interminable "guess-try-measure-correct" routine to be destroying the fun.
 
Garno":2yctlvu6 said:

Thanks... i've watched all of his videos and as an exponent and promoter of the technique he skirts the actual issues of set up. All he does is quote x/y imperial height and p/q imperial depth... and voila....

Because he is ONLY using accurate imperial standard thickness materials he just quotes the standard set up dimensions.

in reality if you have a non stadard size then you have to guess, cut measure and adjust ove and over. And because both the bit height and the fence location adjust the fit then you are trying to manage two variable at the same time.
 
So...

I might have fundamentally misunderstood this, but it seems to me that the important factor seems to be that the square edge fits exactly into the birdmouth with no overlap. The number of sides is defined by the router bit as it sets the angle (60 deg for six sided and 45 deg for eight sided). So the critical factor is to set the bit at the height that gives a rebate that is the depth of the stock you are using.

I’ve done some maths and it looks like if you set your bit so the corner is 0.5 x the thickness of your stock for six sided and 0.293 x thickness of the stock for eight sided, that should work. That depends on each sided being the same thickness and the same width.

9_FCE1_E62_DAE1_422_C_AD4_F_EE61_DADC530_E.jpg


00_E4_DCE7_220_A_453_B_9926_8899778_E4052.jpg


I’d appreciate someone competent checking my working out.
 
Dave henry is the master of birdsmouth, he has several videos about it and one has exact measurements and a cutting list, even if it is in imperial. I'm away from home and don't have the exact link I'm afraid.

But its easy to trial and error if you cant do the math. As said above, use a piece of scrap the same thickness as the real items and just ease the cutter up wards till you leave only a razor edge of the top (or in some cases the bottom, depending how many sides).
Once you have the correct height, its better to take the fence forwards a bit on a first run so you take two bites. This gives a much smoother edge with less tear out or fuss.
Ive just bought my third birdmouth cutter and am eager to get started with it after new year.
 
Thanks all for the input.

Its not the maths that is frustrating me - i can do that. its the accuracy of setting the router when you are measuring from the table top to the outermost corner of the cutting edge. Its all very well knowing i need 6.072 mm but getting that set in practice is problematic. Especially so when you are trying to measure with a router depth gauge or a vernier caliper onto that share edge.

I have watched all of the videos from DAve Henry - thats what got me interested.

From what everyone is saying it sounds like i'm not missing any knowledge, I just think the bottom line is that this is just going to take practice and building up some skill.


Thank you all
 
i have and use a depth gauge.

my point is ... which people seem to be missing... is that trying to use that to set the EDGE of the bit is difficult. and any change you subsequently need to make to the bit height requires another change to the fence position.

i simply asked if there was a technique to this that i am missing that isn't repetitive test cuts over and over. Sounds like there isn't.
 
Why not set the digital depth gauge to 6.072, lock it in place, and then move it to the edge of the bit and raise or lower until level with the bit edge you need?

The digital depth gauge has a base at the bottom of the measuring column to enable this.
 
Garno":3lhmms5m said:
Why not set the digital depth gauge to 6.072, lock it in place, and then move it to the edge of the bit and raise or lower until level with the bit edge you need?

The digital depth gauge has a base at the bottom of the measuring column to enable this.

Why 6.072?
 
Brandlin":3h0juiid said:
Garno":3h0juiid said:
Why not set the digital depth gauge to 6.072, lock it in place, and then move it to the edge of the bit and raise or lower until level with the bit edge you need?

The digital depth gauge has a base at the bottom of the measuring column to enable this.

Why 6.072?

No idea, Thats the number you quoted a couple of posts up. :?
 
Back
Top