You are using an out of date browser. It may not display this or other websites correctly.
You should upgrade or use an alternative browser.
You should upgrade or use an alternative browser.
English Workbench Build
- Thread starter nabs
- Start date


Help Support UKworkshop.co.uk:
This site may earn a commission from merchant affiliate
links, including eBay, Amazon, and others.
memzey
Established Member
Lol!nabs":2088fi4o said:in this one I attempt to convey the spirit of the nail and its eternal struggle with the timber etc.
Whereabouts in Herts are you guys? Anywhere near my neck of the woods?
a few miles from St Albans - of course I can't give specific details in case BM finds out and tries to force that Guinness on me!.
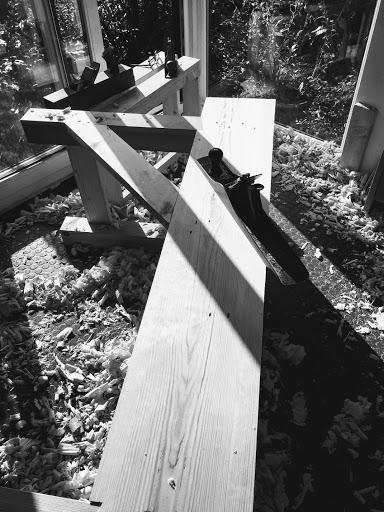
I have now flattened the top and rear apron - it took about an hour and forty five minutes (for the rear I just took off the grungy surface but made no effort to flatten it). This is in addition tof the time I spent previously removing the high spots on the top and doing the front apron, so all together I have spent a several hours flattening.
I followed the formula specified by Mr Maguire (remove obvious high spots, go across the grain until you get full shavings; go diagonal in one direction then return in the other; finally a few full length shavings). I did check regularly that it was getting flatter but it seems that this technique does not require a lot of skill and the top came out flat despite my inexperience. Mind you, I am pretty sure having a long plane helped.
I did go over the top with a smoother, forgetting that I will have to turn the bench upside down to install the vice thus scratching and marking it all over again.


I then cut off the end of the bench to level it up.

Finally, I drilled 4 holes for the vice, thinking this would save time compared with chopping out a larger single mortice (this step actually added loads of unnecessary faffing around, so don't copy me!).
I have a 1 1/4 auger bit that was included in a mixed bag of bits and this is just the right size to accommodate the screw, rods and QR mechanism with a bit of wiggle room.
I sharpened the bit first - a task I had been nervous of doing before getting this mixed bunch of bits to practice on, however it turns out there is not a lot to know :
1. you can sharpen the 'spurs' (the spurs score the circumference of the hole to create a neat cut), but you should only file them on the inside edge. Otherwise you will reduce the diameter of the circle that is scored so the entrance to the hole is more likely to torn by the cutting lips as they enter the wood.
2. sharpening the cutting lips can be done with a saw file - a few gentle strokes is normally enough, and then a very light pass underneath to remove any burr (note that you don't need to get them particularly sharp for them to cut).
The only thing I have found that actually stops them working is when the feed screw is knackered or when there is an insufficient relief angle on the underside of the cutting edges (in which case the shavings push the bit out of the hole and stop the lead screw from getting a purchase). It is easy to fix the latter by making the underside of the cutting lips a bit steeper - not sure if a dodgy feed screw can be fixed though.
anyhow, I digress. I'll do another update tomorrow - nearly done!

I have now flattened the top and rear apron - it took about an hour and forty five minutes (for the rear I just took off the grungy surface but made no effort to flatten it). This is in addition tof the time I spent previously removing the high spots on the top and doing the front apron, so all together I have spent a several hours flattening.
I followed the formula specified by Mr Maguire (remove obvious high spots, go across the grain until you get full shavings; go diagonal in one direction then return in the other; finally a few full length shavings). I did check regularly that it was getting flatter but it seems that this technique does not require a lot of skill and the top came out flat despite my inexperience. Mind you, I am pretty sure having a long plane helped.
I did go over the top with a smoother, forgetting that I will have to turn the bench upside down to install the vice thus scratching and marking it all over again.
I then cut off the end of the bench to level it up.
Finally, I drilled 4 holes for the vice, thinking this would save time compared with chopping out a larger single mortice (this step actually added loads of unnecessary faffing around, so don't copy me!).
I have a 1 1/4 auger bit that was included in a mixed bag of bits and this is just the right size to accommodate the screw, rods and QR mechanism with a bit of wiggle room.
I sharpened the bit first - a task I had been nervous of doing before getting this mixed bunch of bits to practice on, however it turns out there is not a lot to know :
1. you can sharpen the 'spurs' (the spurs score the circumference of the hole to create a neat cut), but you should only file them on the inside edge. Otherwise you will reduce the diameter of the circle that is scored so the entrance to the hole is more likely to torn by the cutting lips as they enter the wood.
2. sharpening the cutting lips can be done with a saw file - a few gentle strokes is normally enough, and then a very light pass underneath to remove any burr (note that you don't need to get them particularly sharp for them to cut).
The only thing I have found that actually stops them working is when the feed screw is knackered or when there is an insufficient relief angle on the underside of the cutting edges (in which case the shavings push the bit out of the hole and stop the lead screw from getting a purchase). It is easy to fix the latter by making the underside of the cutting lips a bit steeper - not sure if a dodgy feed screw can be fixed though.
anyhow, I digress. I'll do another update tomorrow - nearly done!
custard
Established Member
nabs":20noc5zx said:in this one I attempt to convey the spirit of the nail and its eternal struggle with the timber etc.
Very good!

And the bench is none too shabby either.
El Barto
👍
Looking great
sundaytrucker
Established Member
This is looking great Nabs.
thanks all!
As I mentioned earlier, my brilliant plan of drilling separate holes for the bars/screw/QR mechanism for the vice was not a success. The holes have to be positioned exactly right and, although I had the holes in the right place, it seems I had not drilled them completely square and both the rods were binding on the walls of the holes. I wasted some time trying to adjust the undercarriage position (turn bench over, remove all the screws, reposition, find it flip bench, find it did not work etc) before concluding the only way to do fix it was to gouge out the edges of my previously perfectly neat holes.
Several bench flips later and I go it to work properly. Matters were made worse when it turned out some buffoon (me) and removed my ratchet-spanner and hidden it in the boot of the car, only for it to be rediscovered a day after it was needed. Thus I turned a 30 minute job into 3 hours of fannying around - if I were doing it again I would just cut out a large single mortice (with plenty of wriggle room) to allow all the components through the apron.
Not a lot to say about fixing the vice - you need to make up a wooden spacer or two and then you can either bolt it through the top or use coach screws from underneath


I used 70mm M10 coach screws for the undercarriage and M6s for the jaws*.
The wooden insert on the front jaw is a maple and salvaged from the vice on my old bench.
I also made the bench stop - not a lot to say really, you just plane it a fraction bigger than the mortice and then take a few savings off until it is a tight fit. Apparently it is possible to split the top along the long grain if you make that dimension too tight, so be careful.
I may have to replace it with harder wood in the future (i used a bit of old fence post, which is all I had).
* for those after doing a proper job, the rear jaws of old record vices have a screw threaded hole (1/4'' BSW)


As I mentioned earlier, my brilliant plan of drilling separate holes for the bars/screw/QR mechanism for the vice was not a success. The holes have to be positioned exactly right and, although I had the holes in the right place, it seems I had not drilled them completely square and both the rods were binding on the walls of the holes. I wasted some time trying to adjust the undercarriage position (turn bench over, remove all the screws, reposition, find it flip bench, find it did not work etc) before concluding the only way to do fix it was to gouge out the edges of my previously perfectly neat holes.
Several bench flips later and I go it to work properly. Matters were made worse when it turned out some buffoon (me) and removed my ratchet-spanner and hidden it in the boot of the car, only for it to be rediscovered a day after it was needed. Thus I turned a 30 minute job into 3 hours of fannying around - if I were doing it again I would just cut out a large single mortice (with plenty of wriggle room) to allow all the components through the apron.
Not a lot to say about fixing the vice - you need to make up a wooden spacer or two and then you can either bolt it through the top or use coach screws from underneath
I used 70mm M10 coach screws for the undercarriage and M6s for the jaws*.
The wooden insert on the front jaw is a maple and salvaged from the vice on my old bench.
I also made the bench stop - not a lot to say really, you just plane it a fraction bigger than the mortice and then take a few savings off until it is a tight fit. Apparently it is possible to split the top along the long grain if you make that dimension too tight, so be careful.
I may have to replace it with harder wood in the future (i used a bit of old fence post, which is all I had).
* for those after doing a proper job, the rear jaws of old record vices have a screw threaded hole (1/4'' BSW)
finishes
Tradition has it that you should either use a 50/50 mix of boiled linseed oil* and turpentine or not bother with a finish at all. I still like to do a bit of tool fiddling now and then - which often involves some grubby metalworking - so I decided to put a finish on mine to stop the worst of the dirt getting embedded in the top.
I don't like the dog wee yellow colour of BLO on pine so I decided to make my own concoction. The look I was going for was muddy orange with blotches, and bingo! This is exactly what I got!
Quite probably Farrow and Ball will be along with their own version soon but in the unlikely event you can't wait then you can make your own by simply mixing some miscellaneous brown varnish with BLO and turps in roughly equal proportions. I added that little extra touch of class by using a jar from some Waitrose sun-dried plum tomatoes (the label fell off, so you will have to take my word for it).

I didn't try to remove the various bumps and scratches caused by my vice fitting shenanigans on the basis that the bench is going to get a battering over the coming months and years regardless.
the finish actually doesn't look too bad from certain angles:

.. but you get the full orange/blotch experience when the light is behind you:

so that's it, the bench is basically done. The only remaining task is to drill some holes for my new holdfasts, and a handful of other jobs I might do at in the future:
* add a hardwood insert for the inside face of the vice
* add a shelf at either end
* add a bench stop that goes length ways (see phil.p's bench above) - tbh I forgot about this, but I will wait now and see how I fair with the holdfasts before going ahead
I'll do a couple of post on the holdfasts + tools I used, vs the tools I actually needed, and that will be it. Thanks for watching!
* PS It doesn't hurt to repeat the warning that BLO can spontaneously combust, particularly when left to dry on crumpled rags/tissues - lay them flat outside to dry
Tradition has it that you should either use a 50/50 mix of boiled linseed oil* and turpentine or not bother with a finish at all. I still like to do a bit of tool fiddling now and then - which often involves some grubby metalworking - so I decided to put a finish on mine to stop the worst of the dirt getting embedded in the top.
I don't like the dog wee yellow colour of BLO on pine so I decided to make my own concoction. The look I was going for was muddy orange with blotches, and bingo! This is exactly what I got!
Quite probably Farrow and Ball will be along with their own version soon but in the unlikely event you can't wait then you can make your own by simply mixing some miscellaneous brown varnish with BLO and turps in roughly equal proportions. I added that little extra touch of class by using a jar from some Waitrose sun-dried plum tomatoes (the label fell off, so you will have to take my word for it).
I didn't try to remove the various bumps and scratches caused by my vice fitting shenanigans on the basis that the bench is going to get a battering over the coming months and years regardless.
the finish actually doesn't look too bad from certain angles:
.. but you get the full orange/blotch experience when the light is behind you:
so that's it, the bench is basically done. The only remaining task is to drill some holes for my new holdfasts, and a handful of other jobs I might do at in the future:
* add a hardwood insert for the inside face of the vice
* add a shelf at either end
* add a bench stop that goes length ways (see phil.p's bench above) - tbh I forgot about this, but I will wait now and see how I fair with the holdfasts before going ahead
I'll do a couple of post on the holdfasts + tools I used, vs the tools I actually needed, and that will be it. Thanks for watching!
* PS It doesn't hurt to repeat the warning that BLO can spontaneously combust, particularly when left to dry on crumpled rags/tissues - lay them flat outside to dry
John15
Established Member
Congratulations Nick. A job well done. Good luck with making some nice projects on it.
John
John
sundaytrucker
Established Member
Nice job. The lapped dovetails are really quite cool and look so much better than a more traditional lap joint.
finished! I am very pleased with the holdfasts - they are by Simon James and I got mine from Classic Hand Tools, delivered next day at the very reasonable price of £49 for the pair including delivery.
After flattening the front apron is just over 40mm and the holdfast need only a light tap to grip tight. I tried them in the top of my old bench which is 38mm and they worked there too, but it sometimes took a couple of firm taps to get them to hold (they have seem very well made and have a rough finish which I think must help them to work even if the top is a bit thinner than optimal).
One of the things about the new bench that I am really looking forward to is the holdfasts - I have never used them before but after a quick play with them I am sure they will be very useful.
I will put some holes in the top too, but haven't decided where to put them yet. Any recommendations?
Lovely job. Years of fun ahead!
Re holes, I waited until I was making something and bored holes where I needed them. No big deal to whip out the brace and an auger bit each time you decide you need another one.
Re holes, I waited until I was making something and bored holes where I needed them. No big deal to whip out the brace and an auger bit each time you decide you need another one.
And think before you bore them about whether you might want to bolt down a drill stand, pillar drill, morticer or whatever. Kill two birds with one stone.
sundaytrucker
Established Member
Shannon Rogers recently did a video on dog hole placement on his renaissance woodworker blog. I hope this helps.
http://www.renaissancewoodworker.com/guide-to-workbench-dog-hole-placement/
http://www.renaissancewoodworker.com/guide-to-workbench-dog-hole-placement/
jim1950
Established Member
like the idea of the english workbench got two old vices in good nic just need to make the space now, workshop full of wood and tools it trying to make up my mind what goes.
Similar threads
- Replies
- 9
- Views
- 1K
- Replies
- 102
- Views
- 7K