Chopping mortices by hand into inside curves... any tips?

UKworkshop.co.uk

Help Support UKworkshop.co.uk:

This site may earn a commission from merchant affiliate links, including eBay, Amazon, and others.

MarkDennehy

Established Member
Joined
29 Mar 2016
Messages
953
Reaction score
243
Location
Stepaside
Hi folks,
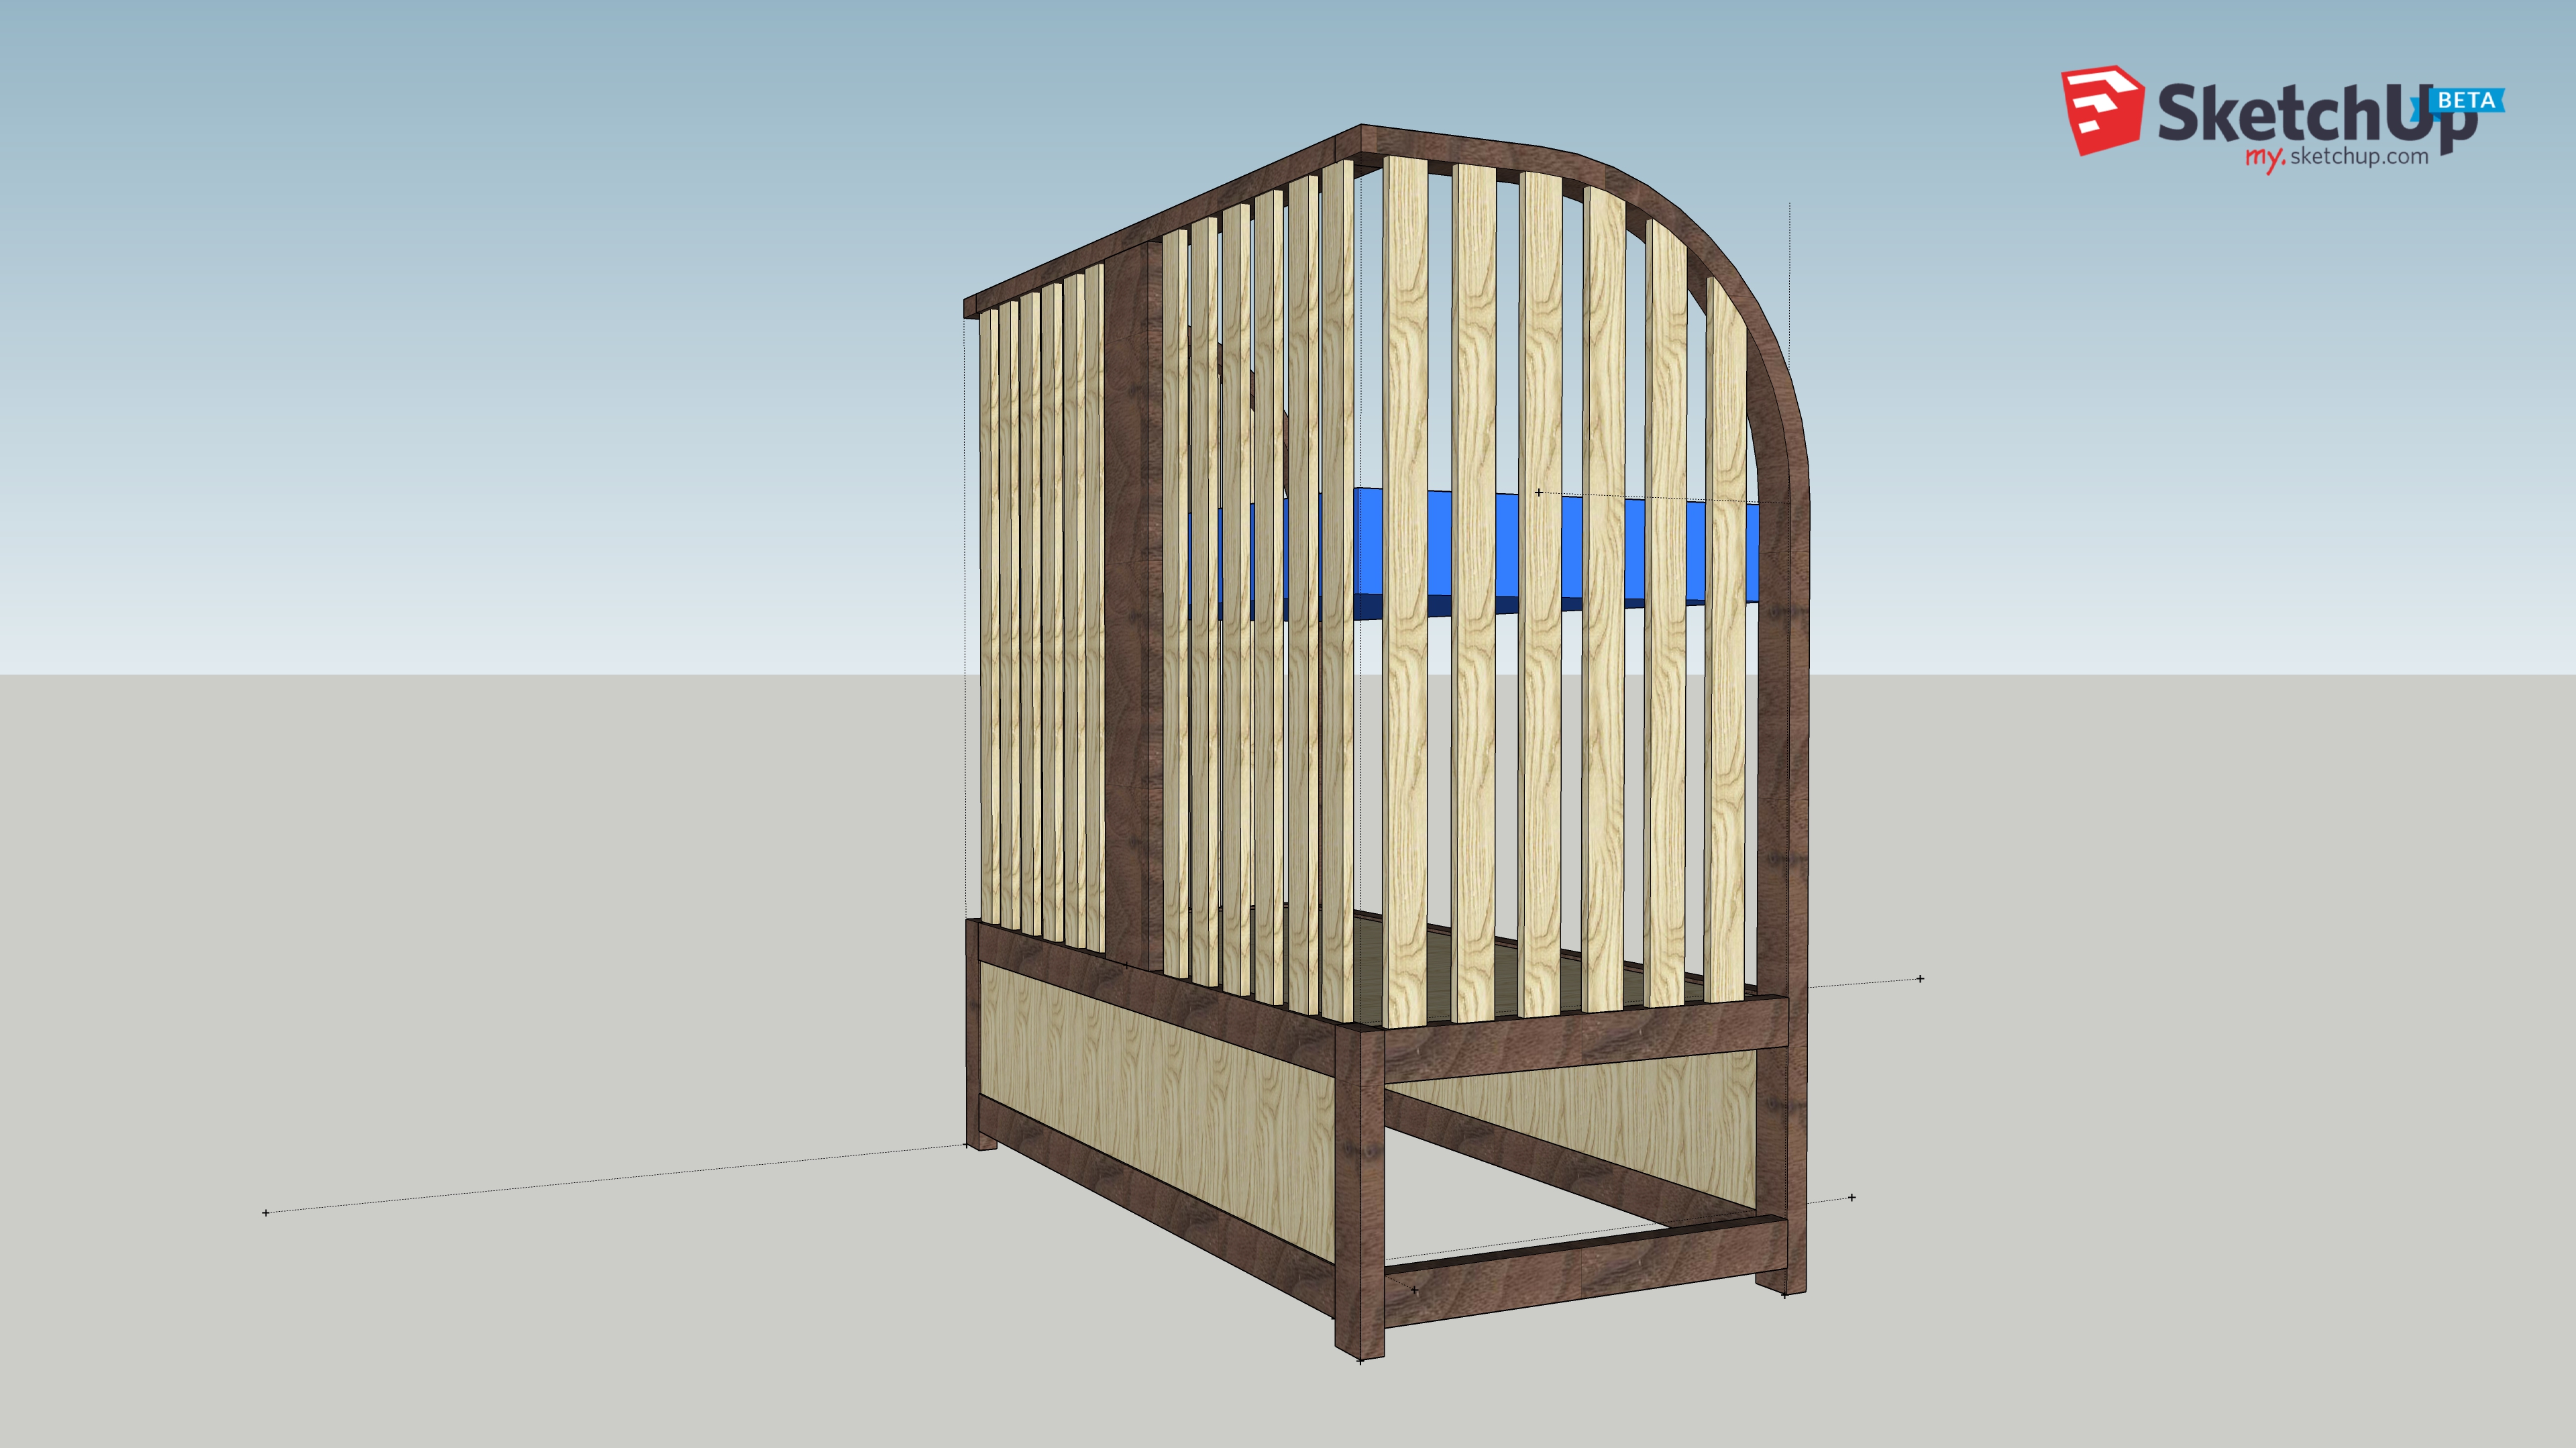
So I've been working away on a small project for the last little while, and finally managed to get some steambending done (it's not perfect but it might do, if I can just blind the person who's getting the project at the end). But part of the design basically requires mortices to be cut into the inside of the curve of the steambent bits (not many, two or three with a few inches of spacing between them) with the mortice running along the curve instead of across it:

IMG_0013a.jpg


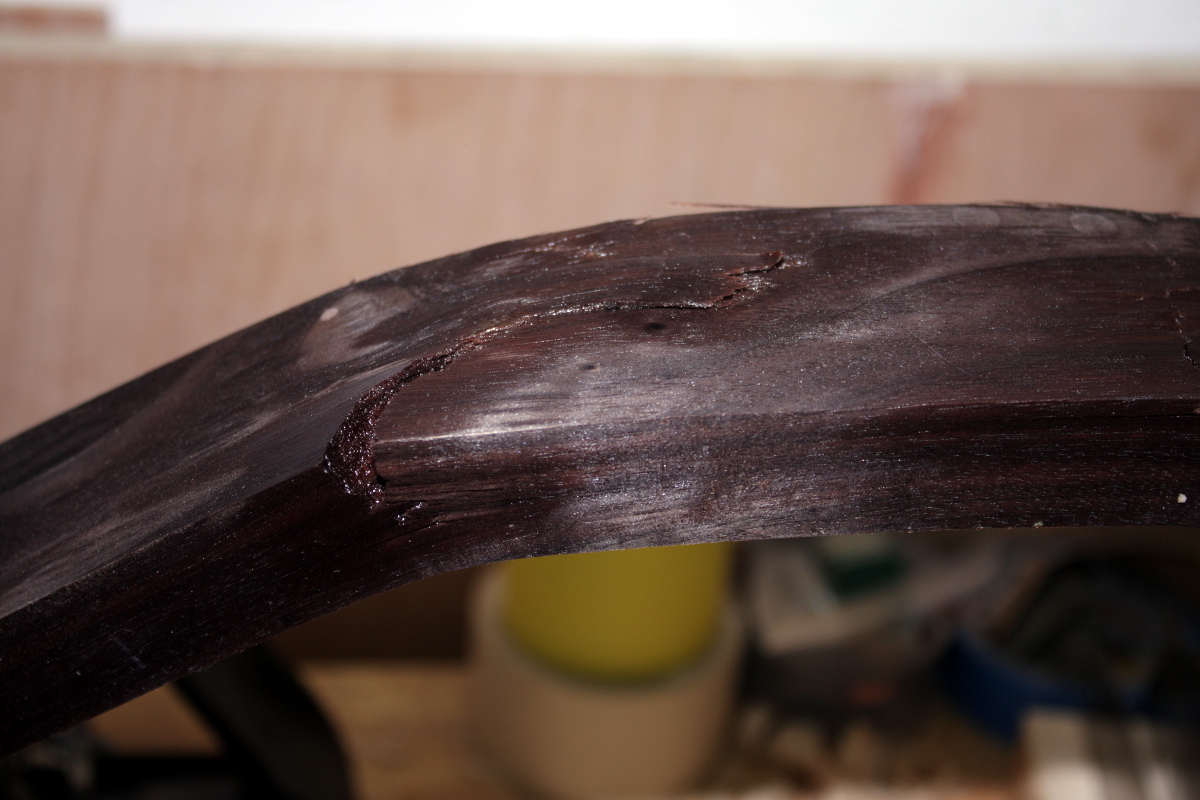
(I know the edges of the bent bit look like they're not very sharp, that's an optical illusion caused by the edges not being very sharp. The compression strap slipped, there were surface cracks, there was spokeshave work and that's not complete yet, but the inner surface has no major defects, it just needs a little smoothing over with the spokeshave)

So... anyone got any good tips on cheating at cutting mortices into inside corners by hand? :D
 
MarkDennehy":1hiibs7o said:
.....

So... anyone got any good tips on cheating at cutting mortices into inside corners by hand? :D
What exactly is the problem? Why not do them the normal way - mark out where they go and chisel them out with a mortice chisel - or any old chisel of the same width as the mortice.
 
Just curious, (but I can understand your nervousness), is there an overwhelming reason why you can't use a pair of dowels instead? It would have a lower chance of any mistake ruining things (well, would if I was doing it!).

If you chop in from outside, you have to undercut the ends of the mortice, but going t'other way risks breakout, as you need to support the exit (outside) side really well. I wouldn't enjoy doing either much.
 
Maybe jigsaw out a support piece the same radius as the outside and drill a row of holes on a pillar drill using a fence to keep them parallel.

You will probably need a support piece anyway for chiselling.
 
Jacob":1v9vgtfw said:
MarkDennehy":1v9vgtfw said:
.....
So... anyone got any good tips on cheating at cutting mortices into inside corners by hand? :D
What exactly is the problem? Why not do them the normal way - mark out where they go and chisel them out with a mortice chisel - or any old chisel of the same width as the mortice.
I've been doing that by hand for all of them so far (that frame in the background is all hand-cut) and on a flat surface I'm happy enough. It's the curve on the surface that has me worried and wondering what I need to watch out for, and if there's a better way than just marking it out and hacking away.
 
Is it a straight mortice or a curved one?

If its straight just mark it out and chop away, you could make a template to mark the mortices.

Pete
 
I'm not sure which would be easier/more likely to succeed Pete - I was mucking about with some test pieces today, and I'm thinking it might be easier to chop the mortice straight (at 90 degrees to the local surface inside the curve at that point or as close as possible) and then cut the tenon at an angle to the slat (which will be vertical).

Basically, it's the joints where the slats meet the curved frame in this:

SidecarCrib1.jpg
 
Looks like you've steam bent kiln dried American Black Walnut? If so you should be well pleased that it's turned out as well as it has!

Anyhow, the key to success on this job is laying it all out. Draw a rod, which is a full size plan of the end section, showing the exact position of all the vertical slats as well as the curved component. Then lay the actual curved component onto the rod, and transfer the position of the vertical slats in pencil on to the actual curved component. Then lay out the position of the mortices. Also, draw in the actual curve of the curved component onto the rod, which will almost certainly be different from your original plan due to spring back.

Now place the curved component in a vice, making sure you have clear access to your first mortice, use a level to keep the vertical section truly vertical. Chop out your mortice keeping the chisel vertical, mark the chisel with some indelible pen to show the required mortice depth. Reposition the curved component in the vice for the next couple of mortices, again using a bubble level to keep the vertical section vertical.

Lay your actual physical slats one by one onto the rod exactly over their drawn positions, and in pencil transfer the position of the actual curved section on to the slats. This gives you the position for the tenon shoulders, cut the tenons and clean down to the penciled shoulder lines.

I regularly make chairs following a similar method to the one I've outlined here. It works. This is the sort of thing I produce following this process,

Pear-Chair-2.jpg


Good luck!
 

Attachments

  • Pear-Chair-2.jpg
    Pear-Chair-2.jpg
    54.5 KB · Views: 82
custard":hh2hkduj said:
Looks like you've steam bent kiln dried American Black Walnut?
Yeah, I couldn't source air-dried walnut over here. Everything's kiln-dried.
If so you should be well pleased that it's turned out as well as it has!
With the one in that last photo, er, not 100%. There were a few cracks because the compression strap worked loose during the bending (my own awkwardness). Today's effort was much better, I clamped the end blocks in place before bending and there's not a single snap or crack anywhere. Of course, that means I now need to decide if I steambend a third piece to try to get two equally well done bits, or if I just go with what I have and try to get things complete before the delivery date (and since it's a crib, that's a real delivery date :D )
Honestly though, it's remarkably easy when you use that polythene bag method and take it slow on the bend (I think today took 15-20 minutes to bend it through 105 degrees on a 10.3 inch radius (and then you let it come back to 90 degrees on a 12 inch radius on the drying form and then wait a week before unclamping).


Anyhow, the key to success on this job is laying it all out. Draw a rod, which is a full size plan of the end section, showing the exact position of all the vertical slats as well as the curved component. Then lay the actual curved component onto the rod, and transfer the position of the vertical slats in pencil on to the actual curved component. Then lay out the position of the mortices. Also, draw in the actual curve of the curved component onto the rod, which will almost certainly be different from your original plan due to spring back.
Now place the curved component in a vice, making sure you have clear access to your first mortice, use a level to keep the vertical section truly vertical. Chop out your mortice keeping the chisel vertical, mark the chisel with some indelible pen to show the required mortice depth. Reposition the curved component in the vice for the next couple of mortices, again using a bubble level to keep the vertical section vertical.
Lay your actual physical slats one by one onto the rod exactly over their drawn positions, and in pencil transfer the position of the actual curved section on to the slats. This gives you the position for the tenon shoulders, cut the tenons and clean down to the penciled shoulder lines.
I regularly make chairs following a similar method to the one I've outlined here. It works. This is the sort of thing I produce following this process,

Good luck!

That's one damn pretty chair custard, and thanks for the tips!
 
MarkDennehy":xh0a03sy said:
it's remarkably easy when you use that polythene bag method

Mark, can you show some photos that illustrate your method? I used to make Windsor chairs so I'm pretty familiar with steam bending, but I could never achieve a viable success rate with kilned timber so only ever used wet or at worst air dried timber. Getting your results with kilned timber is a pretty significant breakthrough for steam bending!
 
It doesn't always work though Custard, this was from this weekend (the compression strap slipped again though, so if I could find a way to keep that reliably clamped through the bend, that might eliminate these, or at least reduce them)...

IMG_0114a.jpg
 
Back
Top