Desk with Shelves - good design & plywood thickness

UKworkshop.co.uk

Help Support UKworkshop.co.uk:

This site may earn a commission from merchant affiliate links, including eBay, Amazon, and others.

Plywood thickness

  • 18mm

    Votes: 5 55.6%
  • 18mm with batons

    Votes: 3 33.3%
  • 12mm

    Votes: 0 0.0%
  • 12mm with batons

    Votes: 1 11.1%
  • Other (please comment)

    Votes: 0 0.0%

  • Total voters
    9

CuriousJake

New member
Joined
7 Apr 2016
Messages
3
Reaction score
0
Location
United Kingdom
Hi all;

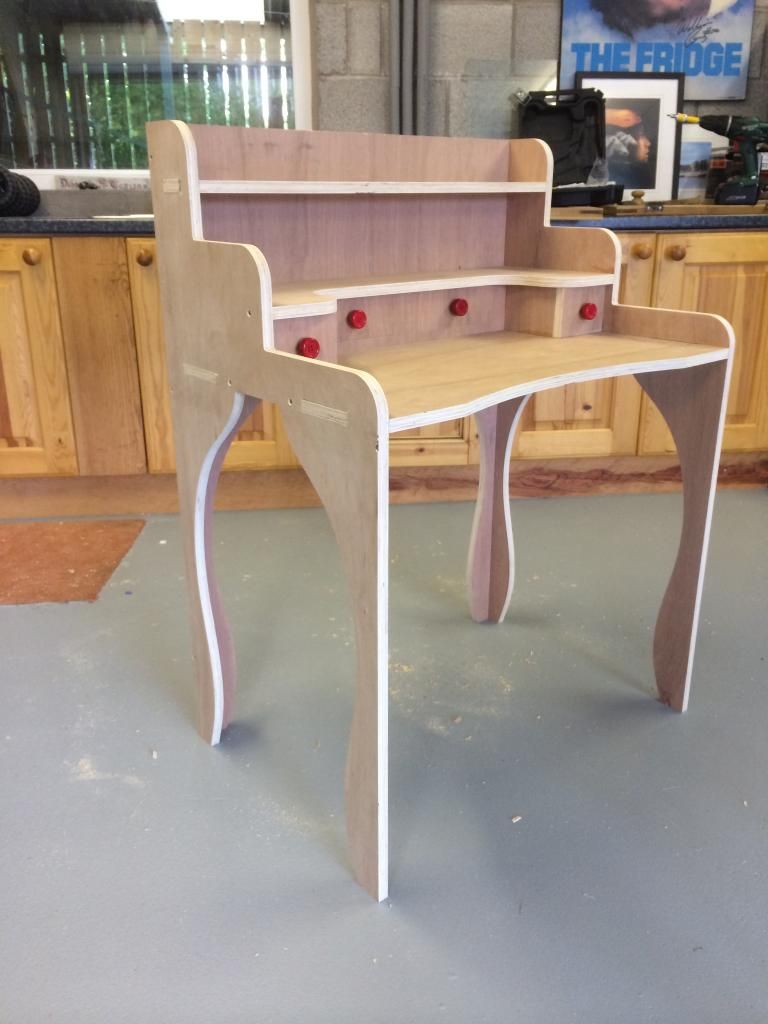
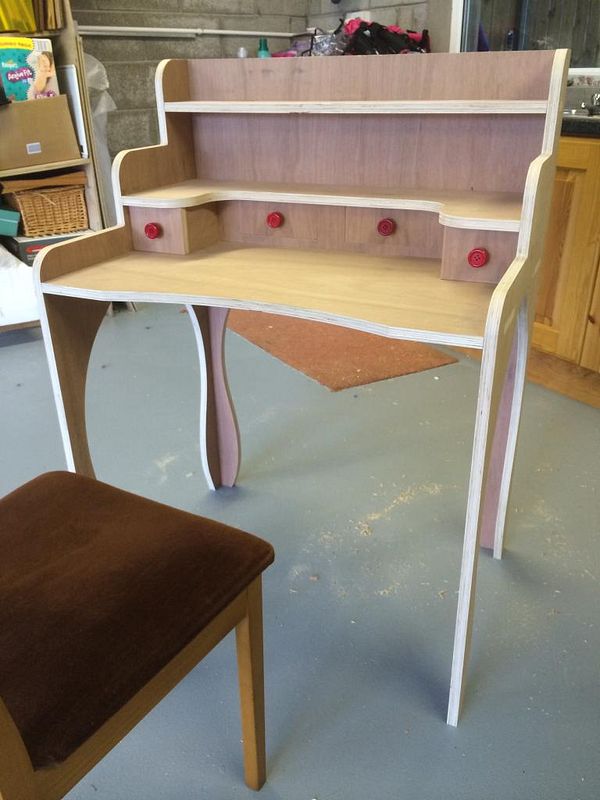
I want to build a PC desk with shelves to the side/top, and have done a design in Google SketchUp. Dimensions 70" high, 42" wide and 26" deep (20" deep for the shelves).

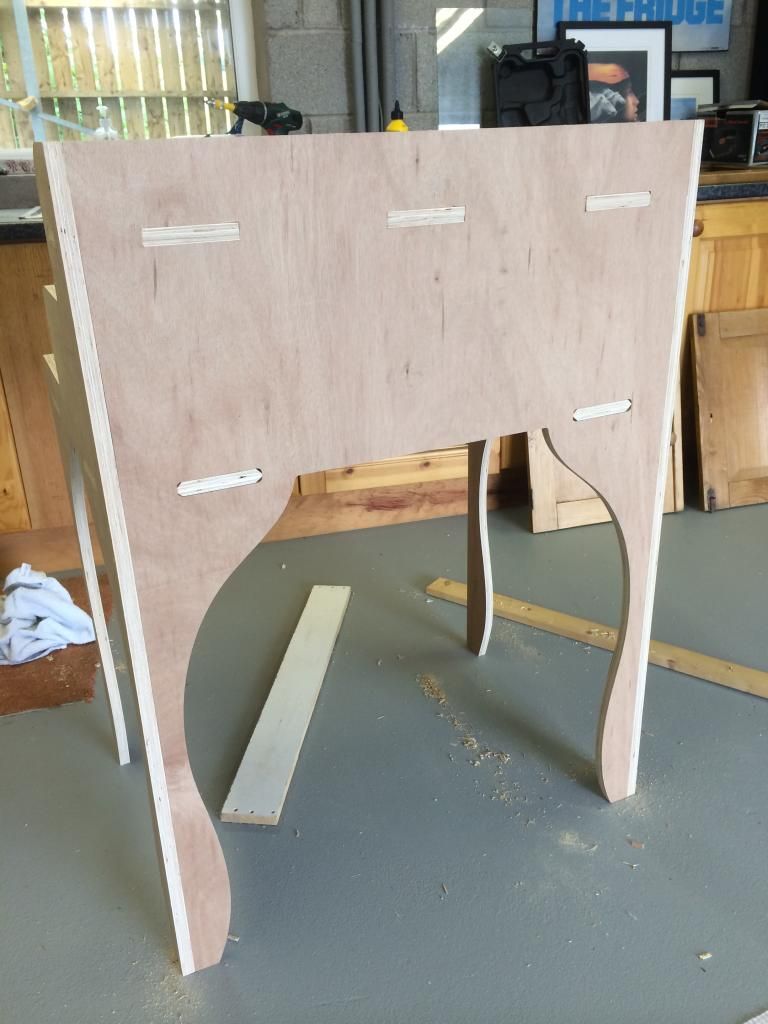
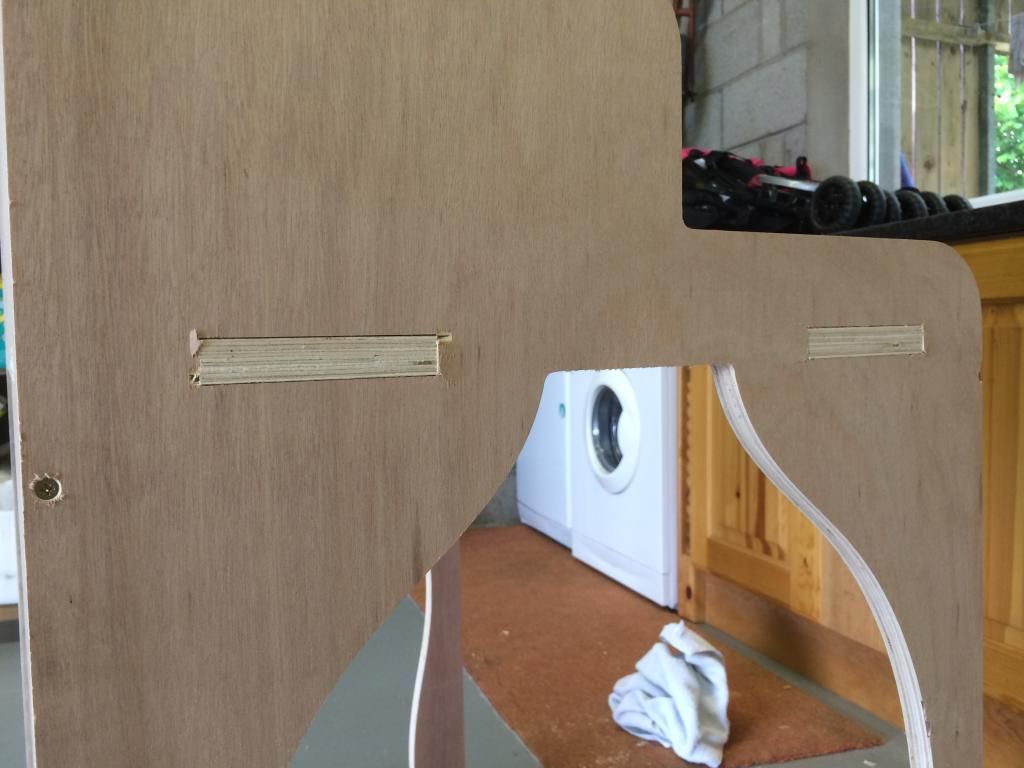
Hopefully the joints I've gone for are a good idea too, Mortise & Tenon and going to use small angle brackets with screws to hold it together.

I intend to use plywood, and my question is what thickness to go with? I originally thought 18mm, but a friend has suggested that'll be overkill (and heavy), so know I'm thinking of 12mm and using a couple of wooden batons under the main desk to prevent it flexing.

Also - what do you think of my design? Our flat is terrible for storage, so some big deep shelves should give me ample space for piling up the awkward items!

Has anyone got any advice for me?

Many thanks in advance for any help!
 

Attachments

  • Assembled 1.png
    Assembled 1.png
    50.2 KB · Views: 2,576
  • Assembled 2.png
    Assembled 2.png
    58.3 KB · Views: 2,576
  • Assembled 3.png
    Assembled 3.png
    52.2 KB · Views: 2,576
  • Assembled 4.png
    Assembled 4.png
    58.5 KB · Views: 2,576
  • Assembled 5.png
    Assembled 5.png
    83.7 KB · Views: 2,576
  • Assembled 6.png
    Assembled 6.png
    8.9 KB · Views: 2,576
  • Assembled 7.png
    Assembled 7.png
    8.5 KB · Views: 2,576
Such long through-mortises in plywood can be a problem to cut.
 
I'd use 18mm for the sides, desk top and top piece. 12mm for the rest. I'd add stiffening battens under the desk top as well as a panel at the back between the sides to stiffen the desk to prevent side to side racking.

The long through mortises don't have to be difficult to cut if you use a router.
Screenshot - 4_7_2016 , 7_36_53 PM.png

Screenshot - 4_7_2016 , 7_37_11 PM.png


Are you still using Google SketchUp?
 

Attachments

  • Screenshot - 4_7_2016 , 7_36_53 PM.png
    Screenshot - 4_7_2016 , 7_36_53 PM.png
    22.9 KB · Views: 2,572
  • Screenshot - 4_7_2016 , 7_37_11 PM.png
    Screenshot - 4_7_2016 , 7_37_11 PM.png
    19.4 KB · Views: 2,572
if you wanted to do the through tennon idea, it can be done easily enough depending on what skills and tools you have at your disposal. I would saw out the waste with a track saw or stitch drilling it. and then use an 18mm router cutter to finish off and tidy it up, you can buy those clamp guides cheap enough.

adidat
 
As above but also I'd split the desktop tenons into two, one front and one at the rear, allowing for more meat in the side pieces for strength, otherwise I think the top half would be in danger of bending sideways and snapping off from the bottom.

Actually I think you should do the same with all the long tenons, split the into two to retain some strength in the side pieces.
 
monkeybiter":g1m6m874 said:
As above but also I'd split the desktop tenons into two, one front and one at the rear, allowing for more meat in the side pieces for strength, otherwise I think the top half would be in danger of bending sideways and snapping off from the bottom.

Actually I think you should do the same with all the long tenons, split the into two to retain some strength in the side pieces.

That's a good idea.
cj desk.png
 

Attachments

  • cj desk.png
    cj desk.png
    19.2 KB · Views: 2,519
Cool, thanks everyone!

I'd somehow completely neglected to think about sideways stability, thanks for pointing it out; a flat back panel beneath the desk gives me a good spot to mount a 4-way socket strip and do some cable management too. I'm probably going to stick with a single tenon for the upper shelves (they won't be taking much weight, and to reduce a little complexity), but I think I'll split the desktop into two as suggested - with the strengtheners underneath the middle upright should provide lots of support to the upper shelves.

Finally I've decided on 18mm thick for the lot - I don't have plans for much else at the minute so want to minimize buying materials, hence if I do it all in one thickness i should be able to be clever and use fewer sheets of material.

This is my first real woodworking project since school, and I've given myself three days in a couple weekends to do it (with my grandad's help), so fingers crossed I wind up with what I want at the end it!

Cheers, Jake

P.s. You're right it's not Google SketchUp any more, I forgot it changed hands..!
 
I can't see the point of those tenons. You will get just as much strength using pocket hole screws and glue and its quicker. If you don't have a pocket hole screw jig just use carcass screws and glue. I'd be surprised if it only took you 3 days to construct as you will need plenty of time to experiment with your technique, as working with ply can be tricky and you will only have one shot at it.
 
I've got to make the desk at my grandads and make sure it all goes together properly, then disassemble it to fit in the car home; I guess it'll also be useful to be able to take it apart to move it in future. Hence, I guessed tenons would be a good idea as the weight should be pretty self-supporting, and I can just use small angle brackets and screws with pilot holes to hold it all together.

Yeah 3 days is pretty ambitious I guess, but fortune favors the brave..! I'm not expecting to create a masterpiece, just something functional that I can filler and paint if I screw it up a little - best way to learn is to try..! If it goes real bad then I can always come back the weekend after to finish it off :)
 
Wouldn't a Stopped (flushed front) Dado Joint be a better option? then you won't see the joints, it will look far more attractive as well, you could use thicker 18mm ply for the outside shell and 12mm for the shelves, to me that makes far more sense than using mortice and tenon joints...anyway good luck with the project.
 
I have to agree - not sure why you're doing through tenons if you're using ply. Ply can be pretty tricky to maintain a clean edge if your making lots of angled cuts (like lots of tenons). This could lead to some of the edges chipping, giving you less than clean through tenons.

Have you considered dowels? You could butt join, drill through with a 10mm bit and then drive in 10mm dowels, cutting them flush afterwards. You'd still get a nice 'through tenon' look, it would be a lot quicker and a lot cleaner join.

Sent from my SM-G900F using Tapatalk
 
Did you get anywhere with this and are there pics of the end result? What did you decide to go with as far as joints are concerned?
 
I did something similar to this about a year ago, with limited success. If i had taken a bit more time it would have turned out quite nice but unfortunetly the outside edges of the table are a bit rough. Luckily this table was made to fit into a small alcove the exact width of the table so the outsides will never be seen. I also used wood screws to reinforce everything together and so far it has held together pretty good. Next time tho, I may just use pocket holes and wood glue to aviod any hassles.

AB91D243-4BCB-4FB2-9FB6-805C1917AA91_zpsibrnyb6e.jpg


A83596D9-3202-4DF4-9CAF-AFF99EE479EF_zpsdegtw3u7.jpg


2146927F-8B37-4874-8189-D80A33A71E99_zpscidgx13k.jpg


E13B0421-556C-4AF7-A185-8FAB32D76F3E_zpswc4jlarh.jpg


00D505B4-4CFF-415C-A540-785F68254665_zps0lk6m7j6.jpg


C6D0F0C9-3952-4845-8819-6A4F1A47CAC2_zps3eboweiy.jpg


Sitting in the room before being installed in its final resting place!

CAD49D99-BAEC-4E9A-BCCE-3B23E05329EC_zps7f8tf0gp.jpg
 
DuncanDesigns":26szapte said:
I did something similar to this about a year ago, with limited success. If i had taken a bit more time it would have turned out quite nice but unfortunetly the outside edges of the table are a bit rough.

Good for you Duncan. You had an idea for something and you turned that idea into a real, physical thing. And it seems to me the positives outweigh the negatives, the shaping on the legs for example looks really well done, I can't see any router scorch marks, and the butt joint where the two components on the rear leg join at 90 degrees, well that looks very tight and professional too.

=D>
 
Back
Top