


Aled Dafis
Established Member
Hi there, here is my account of making an infill plane based on the Holtey 11-SA. I had thought of making something larger - say an A13, but as this was my first attempt at infill planes, I thought I'd start on something smaller and gradually work my way up to a 28" jointer :roll: :roll:
The first seed on the road to making and using infill planes was planted a good few years ago, at the Axminster show, where I had a long chat to Konrad Sauer and tried out some of his planes. Although Konrad's planes were way out of my budget, I was in awe, and knew that I wanted tools that performed and loked this good. A few months later i became aware of a guy called Karl Holtey who also made amazing planes, but were even further away from my budget. These guys have become my planemaking gurus.
If we skip a few years, here we are today
Having studied Karl Holtey and Konrad Sauer's website http://www.holteyplanes.com http://www.sauerandsteiner.com, and read a fair bit in magazines and on the web about infill planes, I set about creating a plane based on the Holtey 11SA
http://www.holteyplanes.com/11sa.htm.
To start off, i pinned two pieces of 4mm thick gauge plate together and milled the dovetails in the sides of the plane using a 60 degree cutter in the school's milling machine - being a teacher really does have some good points.
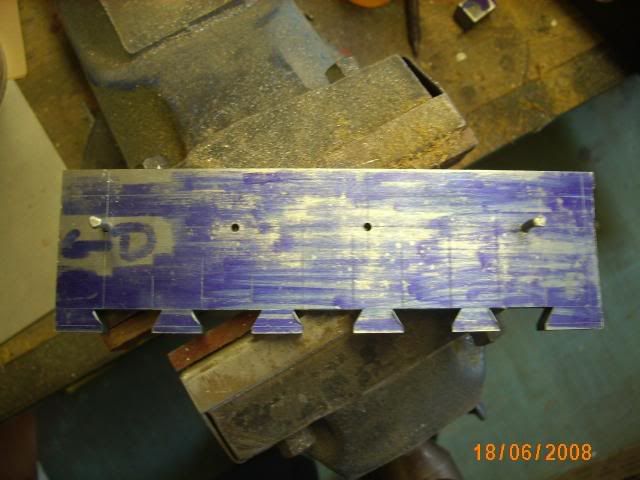
I then market out the positions of the tails on the sole (5mm gauge plate) by clamping the sides and sole to an angle block.
And then proceeded to cuth them, again on the milling machine, with the vice swiveled to 30 degrees.
 [/img]
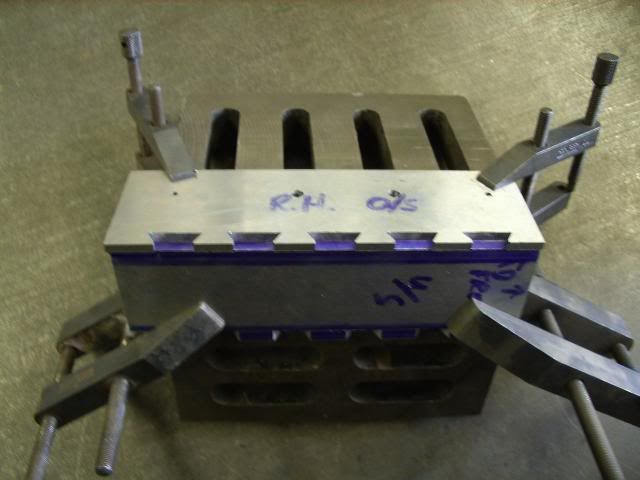
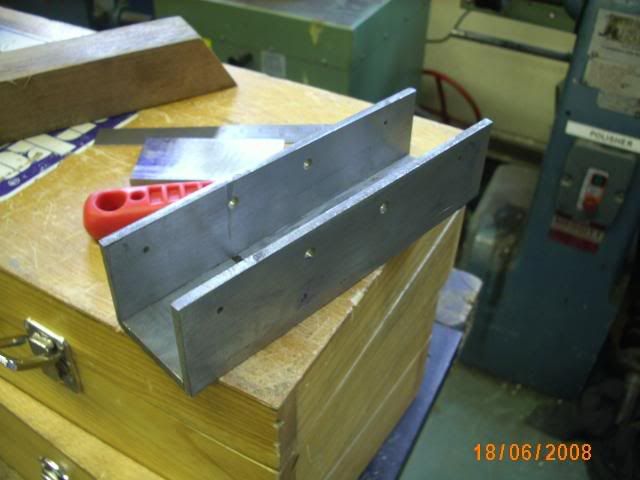
After a little fettling with a three square file the sides and sole were fitted together.
In case you're thinking that I'd measured incorrectly, the pins and tails are intentionally 2mm too long in order to facilitate the peening/peining of the dovetails together.
Here is where I got a little excited and proceeded to prepare the dovetails for peining, and then peined them together before riveting the support block to the sole. This mistake cost me a lot of time and also would have resulted in a lot of money in the swear box if I had one :x :x This over exitement also meant that I forgot to take photos of this process - sorry.
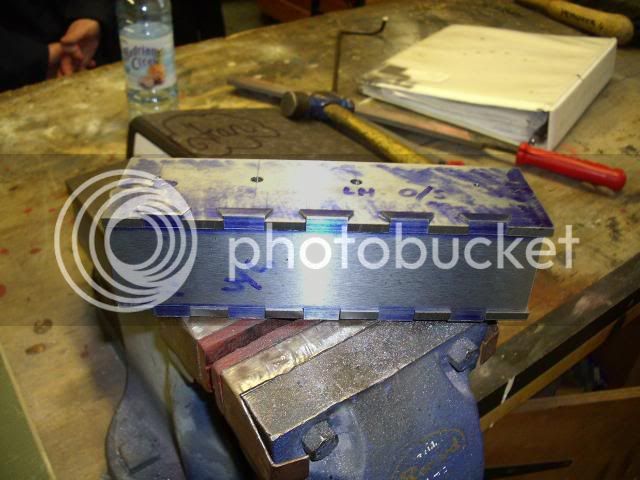
Here's a pic of the shell cleaned up. In hindisght, cleaning the peining at this stage was a bit of a waste of time, as I gave the sole a light skim with the milling machine at the end anyway, so I could have left it all until then.
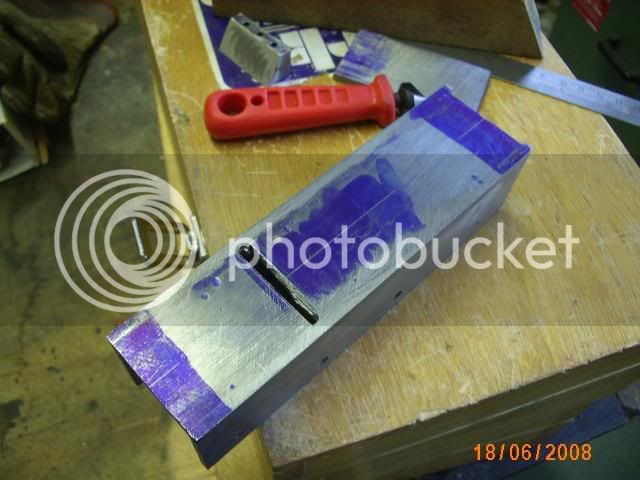
Here's a pic of the support block that should have been fitted before peining the dovetails. The holes are there to take three pieces of 3mm silver steel for riveting to the sole. The pitch of the plane is 60 degrees, so the block was milled to this angle.

I then proceeded to open up the mouth of the plane using a 3mm cutter in the milling machine, but the combination of a very brittle tool and a very heavy handed operator, it broke almost immediately, so i was forced to drill out the mouth, hacksaw the waste, and then clean up with a thin warding file making sure at this stage that the moutrh was too tight to let the iron through.
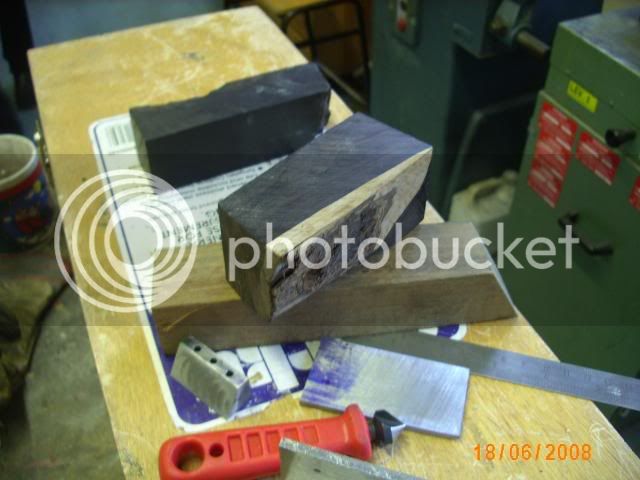
The infill wood I chose to use was African Blackwood for two reasons, the first being that it was very dense, anwould add mass to the already hefty shell; the second reason being that I actually had a few bits of Blackwood of about the correct size laying about under my lathe.
Some of you may be aware that African blackwood is so dense and hard that it's very difficult to work with hand tools, and is very prone to tearout, so instead of treating it as a piece of wood I thought of it more as an engineering material, and sized it again on the milling machine. The bed angle, and the escapement ramp were both cut to 60 degrees.
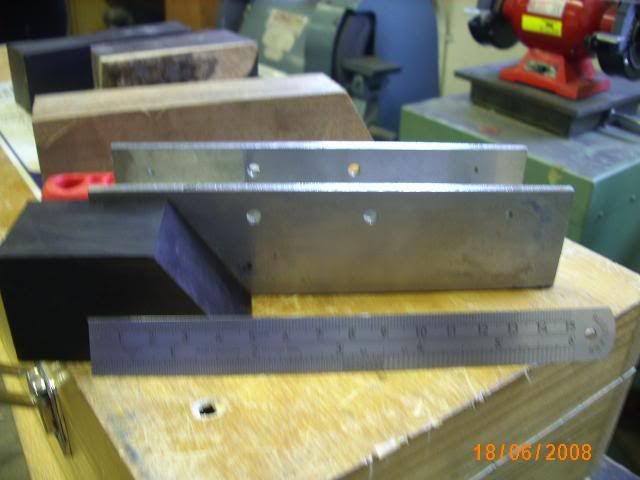
The infills were then fitted into the shell and riveted in place using 5mm silver steel, 1 in the front "bun" and 2 in the rear infill.
This is where the project got exciting, and where I again forgot to take photos - sorry again.
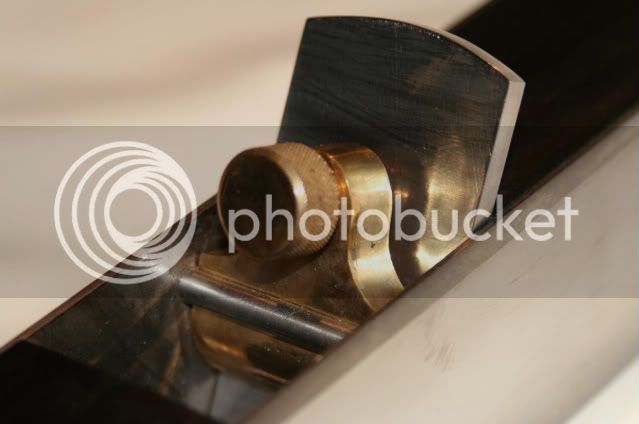
I then inerted another pin above the mouth to take the lever cap as Karl holtey has done with his 11-SA, but my attempt was a complete disaster, in that as I peined the relatively thin 5mm rod, it buckled by about 3mm - again more money should have gone in the swear box - so I had to remove it and rethink my plans, the Holtey plane has a brass sleeve around the pin, bringing it up to say 10mm diameter. Eventually I decided to go with my original plan of a 5mm rod, but I had to make a little jig to supprt it during peining. The second attempt was far better.
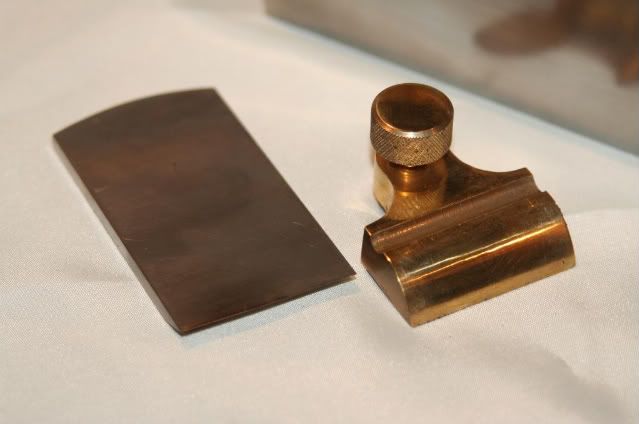
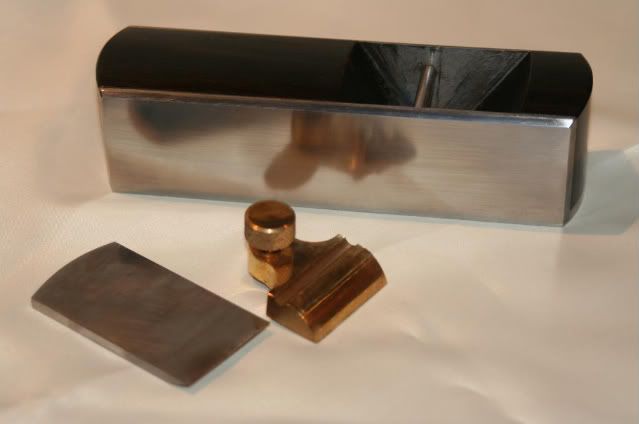
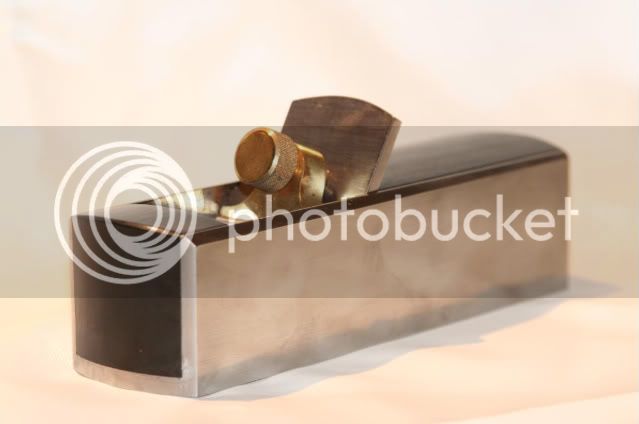
I the went about making the lever cap and knob from brass, and the iron from gauge plate. I don't have any pics of the making, but this is how they turned out.
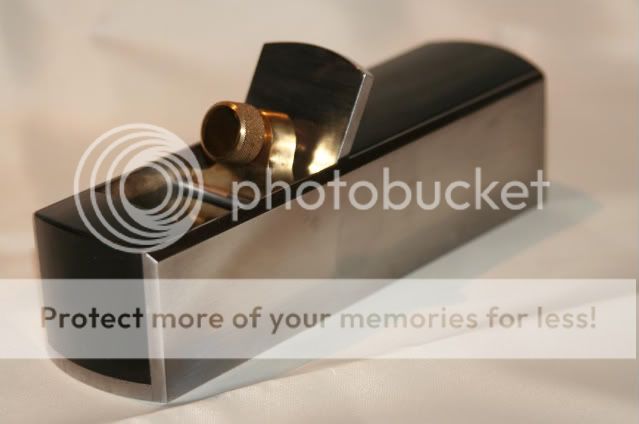
After giving the plane a quick skim on the milling machine to get some dings from peining out, and a lot of time lapping on wet and dry I was nearly there.
Now just to fettle the mouth so it was about 2-3 thou and we were ready to make some shavings.
Sorry for such a long post, but I hope that it inspires someone else to have a go. I know that I relied heavily on the milling machine in my school workshop, but this plane could have been made entirely with hand tools, it just would have taken a bit longer!!
Thanks for reading
Aled
The first seed on the road to making and using infill planes was planted a good few years ago, at the Axminster show, where I had a long chat to Konrad Sauer and tried out some of his planes. Although Konrad's planes were way out of my budget, I was in awe, and knew that I wanted tools that performed and loked this good. A few months later i became aware of a guy called Karl Holtey who also made amazing planes, but were even further away from my budget. These guys have become my planemaking gurus.
If we skip a few years, here we are today
Having studied Karl Holtey and Konrad Sauer's website http://www.holteyplanes.com http://www.sauerandsteiner.com, and read a fair bit in magazines and on the web about infill planes, I set about creating a plane based on the Holtey 11SA
http://www.holteyplanes.com/11sa.htm.
To start off, i pinned two pieces of 4mm thick gauge plate together and milled the dovetails in the sides of the plane using a 60 degree cutter in the school's milling machine - being a teacher really does have some good points.
I then market out the positions of the tails on the sole (5mm gauge plate) by clamping the sides and sole to an angle block.
And then proceeded to cuth them, again on the milling machine, with the vice swiveled to 30 degrees.
After a little fettling with a three square file the sides and sole were fitted together.
In case you're thinking that I'd measured incorrectly, the pins and tails are intentionally 2mm too long in order to facilitate the peening/peining of the dovetails together.
Here is where I got a little excited and proceeded to prepare the dovetails for peining, and then peined them together before riveting the support block to the sole. This mistake cost me a lot of time and also would have resulted in a lot of money in the swear box if I had one :x :x This over exitement also meant that I forgot to take photos of this process - sorry.
Here's a pic of the shell cleaned up. In hindisght, cleaning the peining at this stage was a bit of a waste of time, as I gave the sole a light skim with the milling machine at the end anyway, so I could have left it all until then.
Here's a pic of the support block that should have been fitted before peining the dovetails. The holes are there to take three pieces of 3mm silver steel for riveting to the sole. The pitch of the plane is 60 degrees, so the block was milled to this angle.
I then proceeded to open up the mouth of the plane using a 3mm cutter in the milling machine, but the combination of a very brittle tool and a very heavy handed operator, it broke almost immediately, so i was forced to drill out the mouth, hacksaw the waste, and then clean up with a thin warding file making sure at this stage that the moutrh was too tight to let the iron through.
The infill wood I chose to use was African Blackwood for two reasons, the first being that it was very dense, anwould add mass to the already hefty shell; the second reason being that I actually had a few bits of Blackwood of about the correct size laying about under my lathe.
Some of you may be aware that African blackwood is so dense and hard that it's very difficult to work with hand tools, and is very prone to tearout, so instead of treating it as a piece of wood I thought of it more as an engineering material, and sized it again on the milling machine. The bed angle, and the escapement ramp were both cut to 60 degrees.
The infills were then fitted into the shell and riveted in place using 5mm silver steel, 1 in the front "bun" and 2 in the rear infill.
This is where the project got exciting, and where I again forgot to take photos - sorry again.
I then inerted another pin above the mouth to take the lever cap as Karl holtey has done with his 11-SA, but my attempt was a complete disaster, in that as I peined the relatively thin 5mm rod, it buckled by about 3mm - again more money should have gone in the swear box - so I had to remove it and rethink my plans, the Holtey plane has a brass sleeve around the pin, bringing it up to say 10mm diameter. Eventually I decided to go with my original plan of a 5mm rod, but I had to make a little jig to supprt it during peining. The second attempt was far better.
I the went about making the lever cap and knob from brass, and the iron from gauge plate. I don't have any pics of the making, but this is how they turned out.
After giving the plane a quick skim on the milling machine to get some dings from peining out, and a lot of time lapping on wet and dry I was nearly there.
Now just to fettle the mouth so it was about 2-3 thou and we were ready to make some shavings.
Sorry for such a long post, but I hope that it inspires someone else to have a go. I know that I relied heavily on the milling machine in my school workshop, but this plane could have been made entirely with hand tools, it just would have taken a bit longer!!
Thanks for reading
Aled
")