Circular saw workstation

UKworkshop.co.uk

Help Support UKworkshop.co.uk:

This site may earn a commission from merchant affiliate links, including eBay, Amazon, and others.

Bkn

Established Member
Joined
12 Nov 2009
Messages
50
Reaction score
0
Location
Merseyside
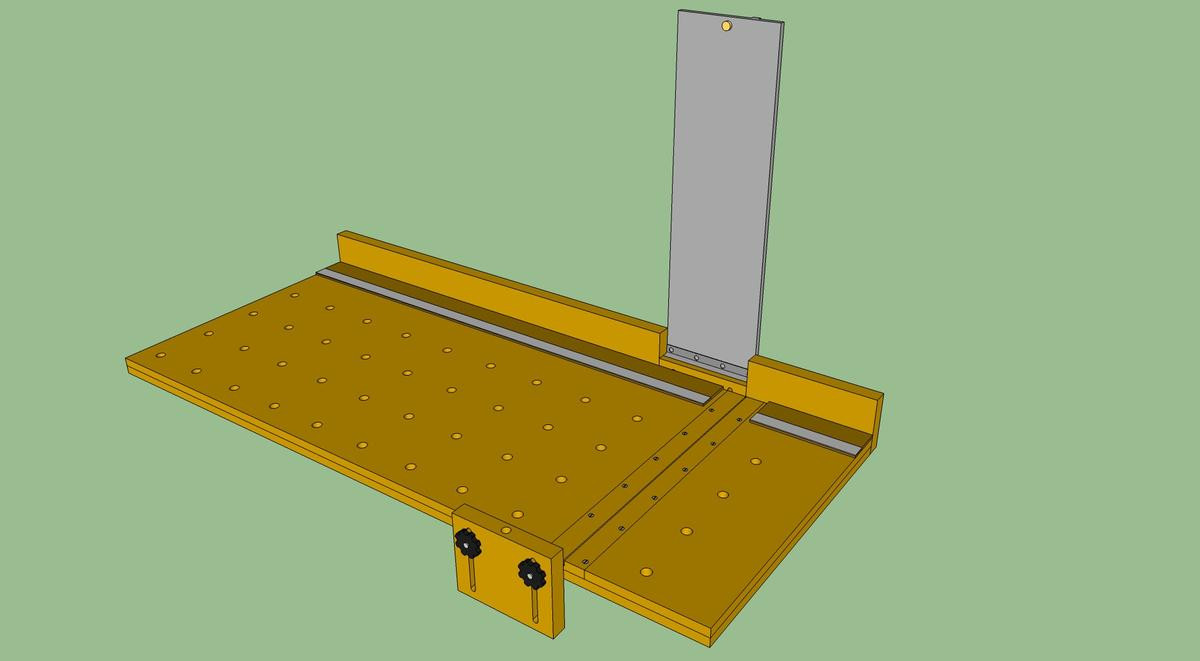
Due to space limitations I can't really fit a table saw anywhere but I'd still like to be able to accurately cut decent sized bits of sheet material and small bits of timber. It'd hopefully be used in place of both a table saw and mitre saw.

I've come up with a little work station type thing and was wondering if there are any glaring flaws with it that I'll need to make modifications to.

01knn.jpg


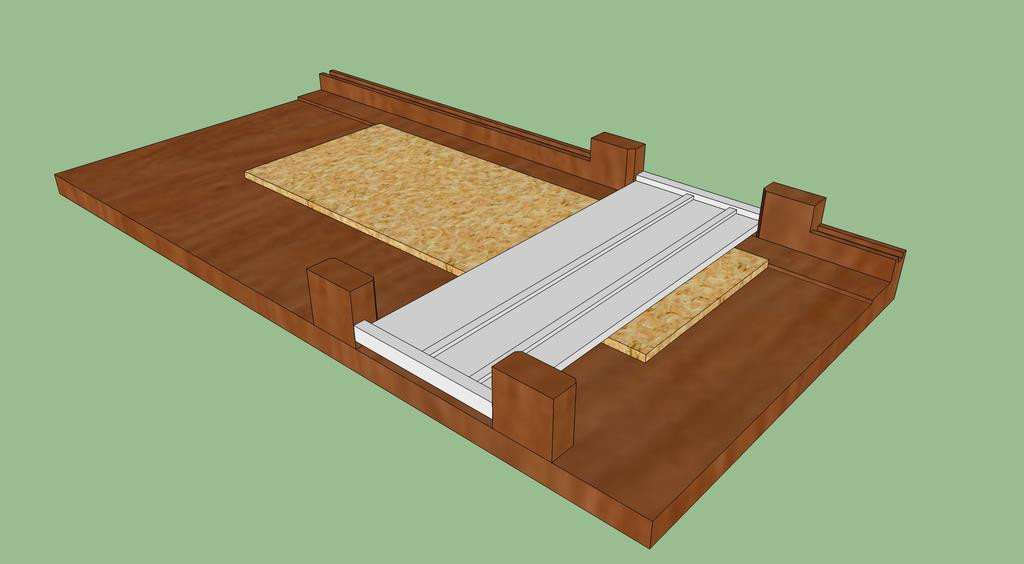
The saw would obviously run on the rail (it'd be nice if I could come up with a sliding hinge mechanism for the back that'd work with different material thickness's).

Maybe put some T-track along the back rail so I could attach stops etc.

I'm going to redesign the whole thing but I just wanted to get a quick idea down to work from. There's a big limitation in that it can't really do cuts at an angle and I'd like to try and figure out a way to rectify this (somehow get rid of the front guides maybe).
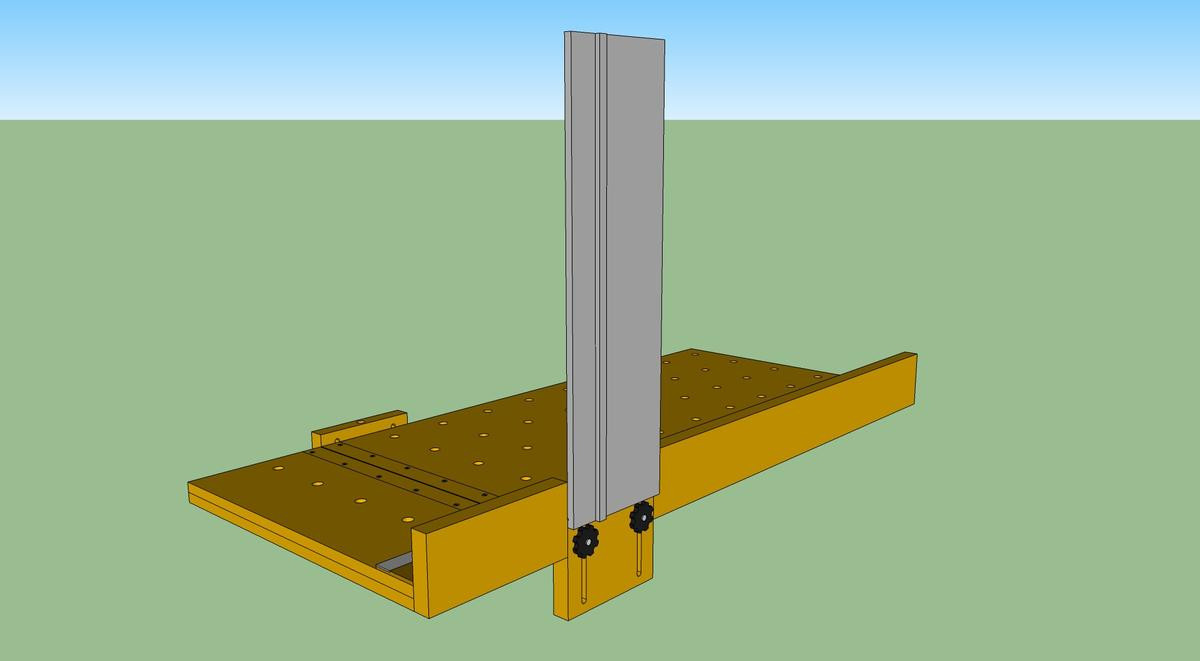
 
By the looks of things you'll not be able to see your cut mark. You may want to incorporate an offset measure along the rear.

And... if you can't have a table saw, where you gonna set this one up? It looks rather large.
 
The cut line is the right side of the track so the cut mark would just be lined up with that.

This can just go up against a wall next to the workbench or router table and will kind of take up the space that a mitre saw station would do. With a table saw I'd really need a decent amount of room around it. There's also the issue of me slowly haemorrhaging money on various tools and bits and bobs to fit out my workshop :D

Not quite sure what you mean by offset measure but I was going to put a measuring strip along the back that zeros at the cutting edge of the track.

Edit - Also I've just realised this should probably go in the Design forum. If any of the mods want to move it then that'd be cool.
 
Looks good actually, but if it was me I'd have a little extra space on the far side, to really get the whole blade out of the cut.

Regarding the design in general, have you seen the festool MFT? Its basically a sheet of MDF with a rail that runs around the edge, on the rail you can hinge attach their guide rail, this then hinges down and you square up your work. If I were you I'd closely study that then make your own version. If you incorporate the 20mm holes in the top you'll also be able to use the festool quick clamps. That way with your limited space you'd be able to have both a extra work surface, use it for sanding etc, and flip the rail over to do cross cut and longer rip cuts.

pkom_hb_mft3_495315_p_01al.jpg
 
Ah good idea, I'll have a look at the festool and take in some design ideas. Thanks :)
 
Have a look at a few videos of it in action as well. I recently bought the MFT clamps for £50, they are quite expensive but I'm sure could be had a little cheaper. Most festool stuff is really worth the money, but the MFT is not much more than an MDF top!
 
Update

Revision 2 (took some ideas from the Festool MFT)

It has:

  • Bench dog holes for clamps and stops
    Replaceable zero-clearance base section
    Embedded tape measure along the back rail
    Hinged guide rail with adjustable height on both sides

7gojj.jpg


66wNn.jpg


Do you think the cut location is ok or would it be more usable if it were more central?
 
Cut location is good, but I'd definatly make the roll a little bit longer, give yourself some run in and run out space, the Festool TS55 doesn't need it with its plunge action, but if your using a cheaper model you'll want to set it to the depth then run through, also remove the higher section to the right of the rail or it will fowl the saw as well.

How deep is it, the rail run, cause you said you wanted to do ripping with it too?

These are the clamps you want:

http://www.festoolusa.com/images/400/48 ... tmftsp.jpg

About £53 new, seems a lot but they are good.

Looking forward to seeing the finished article.
 
Have to say I'd thought up lots of elaborate ideas before getting my saw, similar to this although more aimed at repeatability.

Now I have the saw I've decided a big flat surface and pencil marks are the way to go...

If you haven't tried with just a guide rail and a couple of clamps I'd give that a go before spending too long on plans for anything elaborate.
 
I made two circular saw guides out of some laminate I had. They are simple things of a flat section with a raised guide bar similar to the Festool setup. I added some non slip tape to the backs of them and I can actually use them without clamps if necessary. (I use clamps as a precaution though) I have had them for about two years now and they are in constant use. No measuring required just butt up the edge with my cut line and away you go, simple. :wink:
 
I like it, good idea, but why not just make a giant square (the L-shaped kind) that rides along the edge of the sheet and clamps to it. You could make an oak or suitable hardwood runner to align the saw, and another runner inset into the bottom of the guide at the cut edge. You may even want to contour the bottom like a caul to get even pressure on the cut edge.
 
Back
Top