


Richard T
Established Member
As hinted at in another thread, I started a box mitre plane over the hols.
I have been thinking through the process of making these planes since before I started on bevel down types (largely thanks to Bill C) and it is quite a scary prospect. Only now, after I have cut a lot of steel dovetails, do the ideas of 'prototype' and 'doesn't matter if the first one goes wrong' have a reasonable air of comfort.
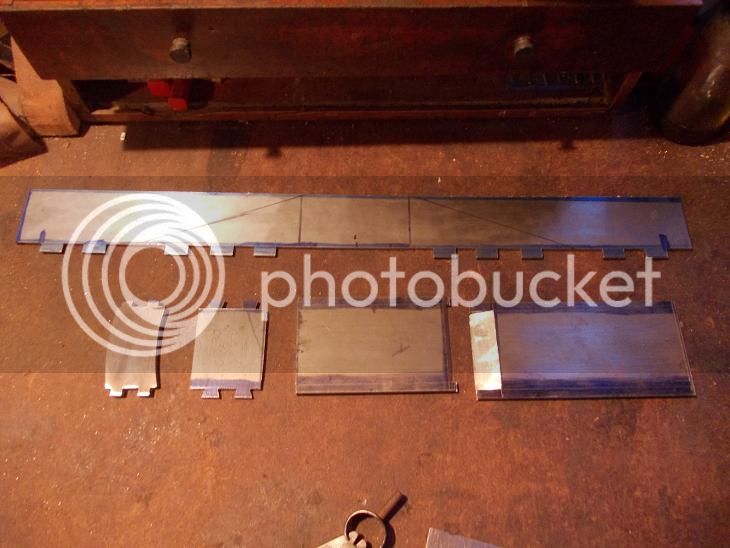
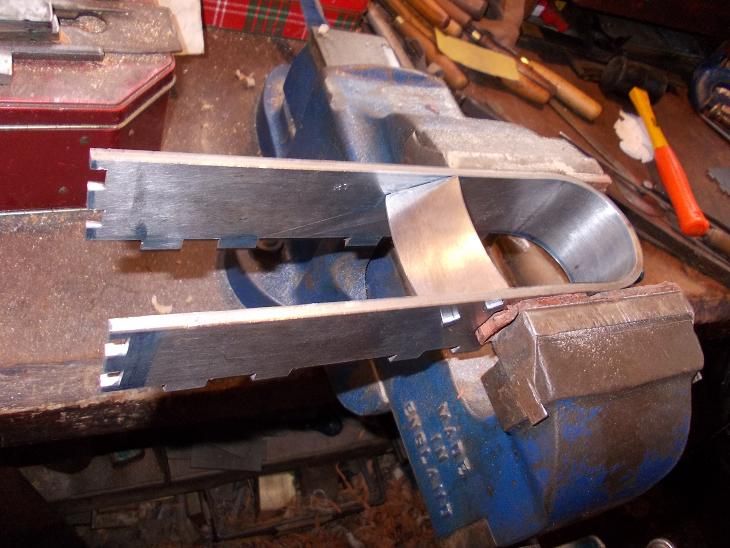
So I made a start before Christmas. 5mm sole, 3mm sides and end piece and a bridge from a bit of scrap that I didn't measure the thickness of.
I took these bits along to the David Stanley auction earlier this month to show to people and to ask Bill Carter what the bridge angle should be. I had guessed that it may be as little as 10 degrees greater than the angle of the iron ... he said more like 6 or 7. So I put it in at 7.
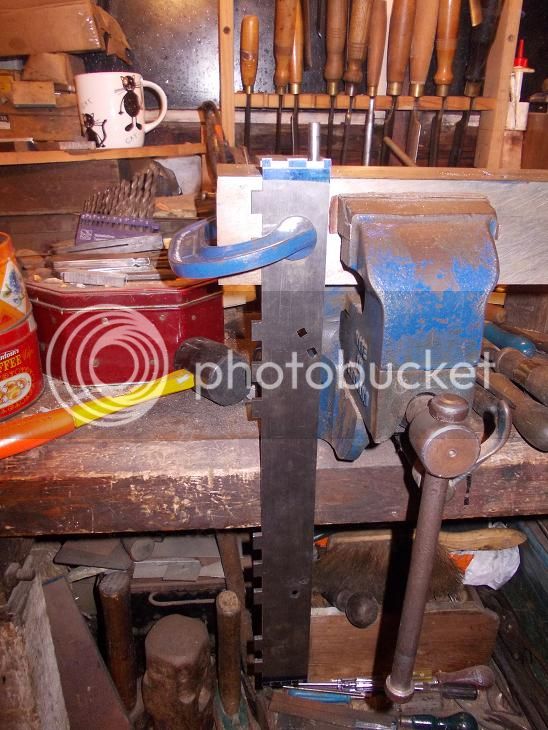
Then I let the end plate in at either side with dovetails.
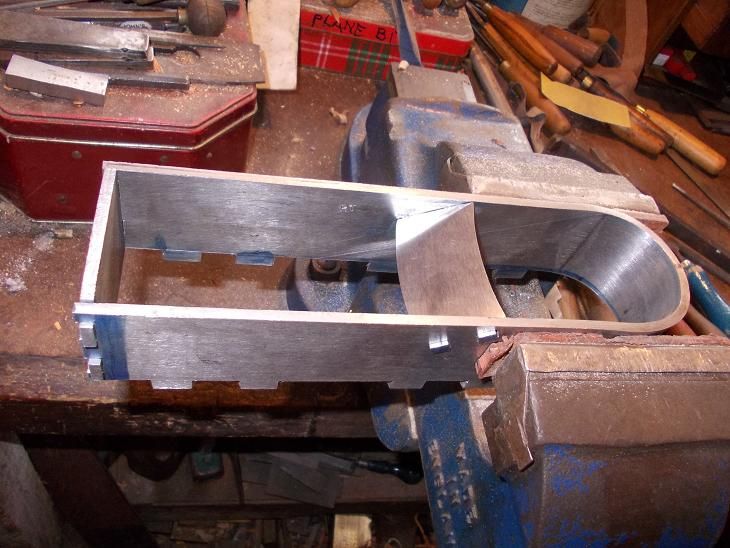
After it was all cut, marked and stamped there was no excuse for putting off the scary part any longer. So I cut a form out of Oak, shaped it with a flat end and set about doing it.
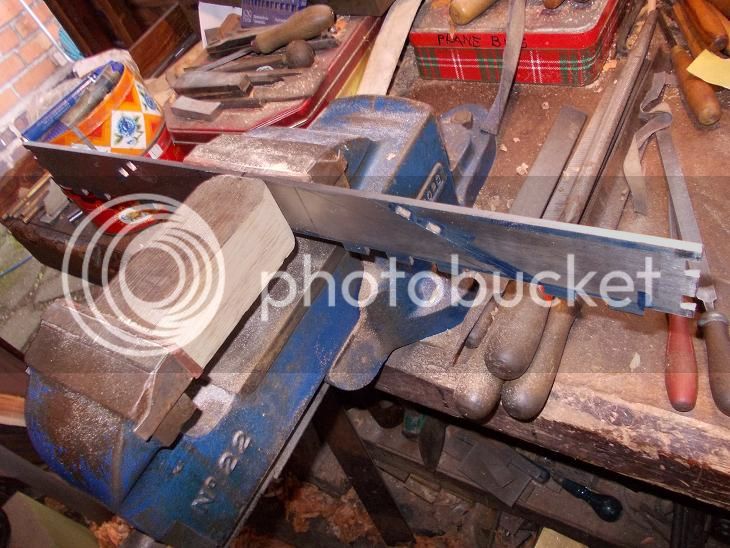
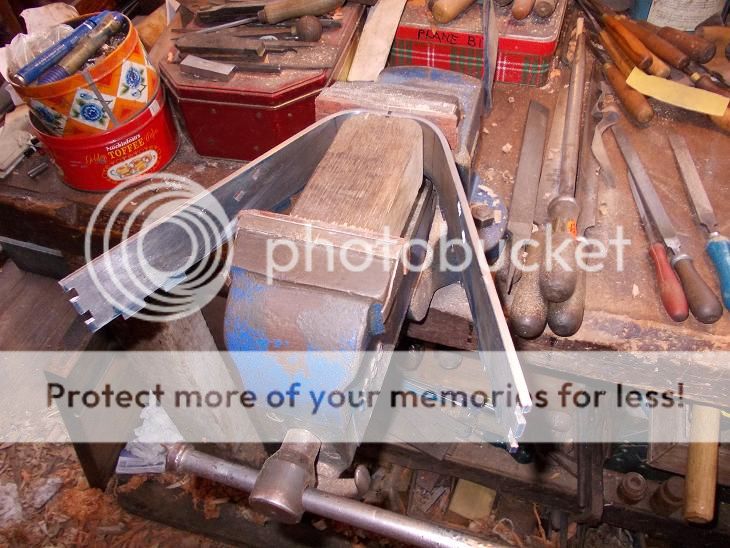
So far so good but it won't go any further because of the jaws of the vice so I have to take it out and bend it with the vice. The form gone, it made a perfectly round back. Some irony - there is no way it could have become so round if I had not started to bend it with a flat in the middle.
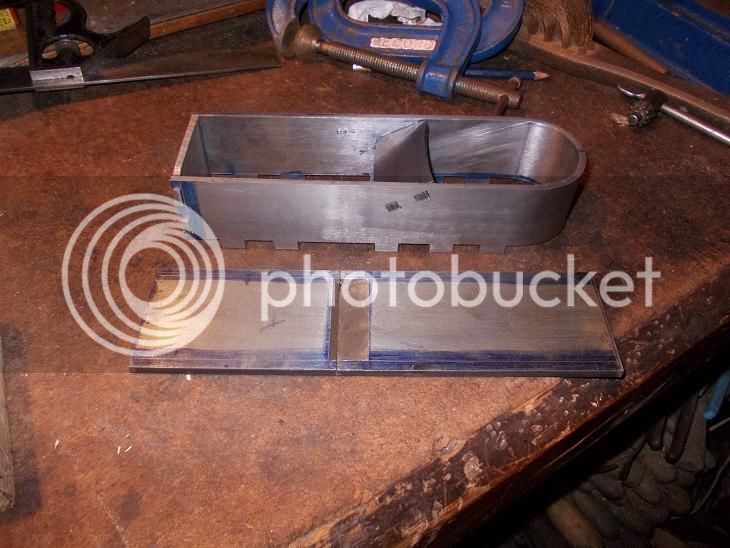
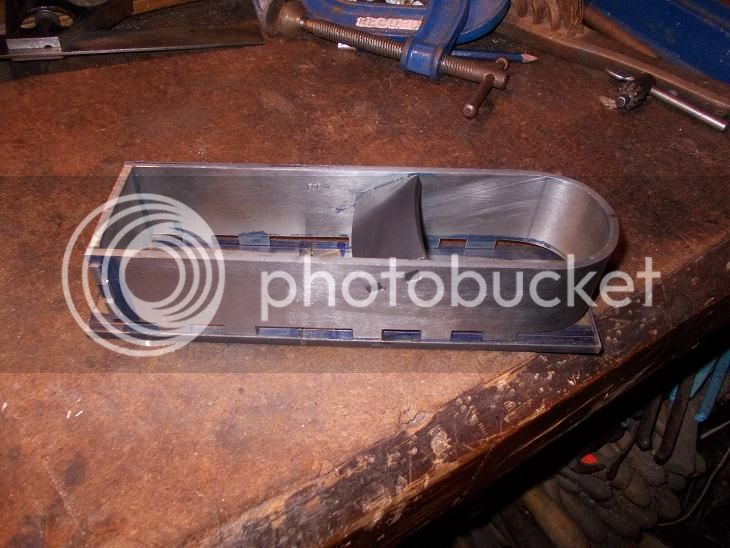
Added the bridge
and the front plate
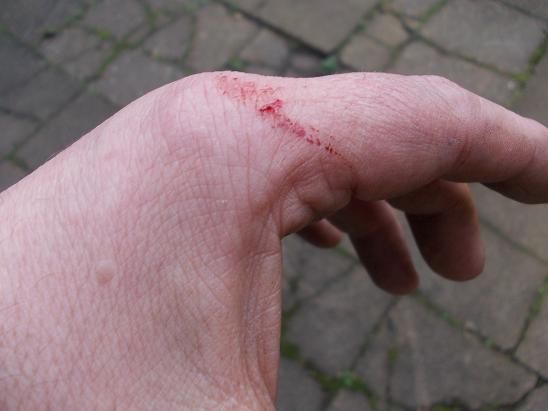
All in all it was not as difficult as I had feared. Mind you it bit me.
the next bit to look forward to.
marking the ends of the pins against the sole and cutting the dovetails to those marks. It's not just making a dovetailed plane, it's making one upside down.
I have been thinking through the process of making these planes since before I started on bevel down types (largely thanks to Bill C) and it is quite a scary prospect. Only now, after I have cut a lot of steel dovetails, do the ideas of 'prototype' and 'doesn't matter if the first one goes wrong' have a reasonable air of comfort.
So I made a start before Christmas. 5mm sole, 3mm sides and end piece and a bridge from a bit of scrap that I didn't measure the thickness of.

I took these bits along to the David Stanley auction earlier this month to show to people and to ask Bill Carter what the bridge angle should be. I had guessed that it may be as little as 10 degrees greater than the angle of the iron ... he said more like 6 or 7. So I put it in at 7.
Then I let the end plate in at either side with dovetails.

After it was all cut, marked and stamped there was no excuse for putting off the scary part any longer. So I cut a form out of Oak, shaped it with a flat end and set about doing it.


So far so good but it won't go any further because of the jaws of the vice so I have to take it out and bend it with the vice. The form gone, it made a perfectly round back. Some irony - there is no way it could have become so round if I had not started to bend it with a flat in the middle.
Added the bridge

and the front plate

All in all it was not as difficult as I had feared. Mind you it bit me.

the next bit to look forward to.


marking the ends of the pins against the sole and cutting the dovetails to those marks. It's not just making a dovetailed plane, it's making one upside down.


